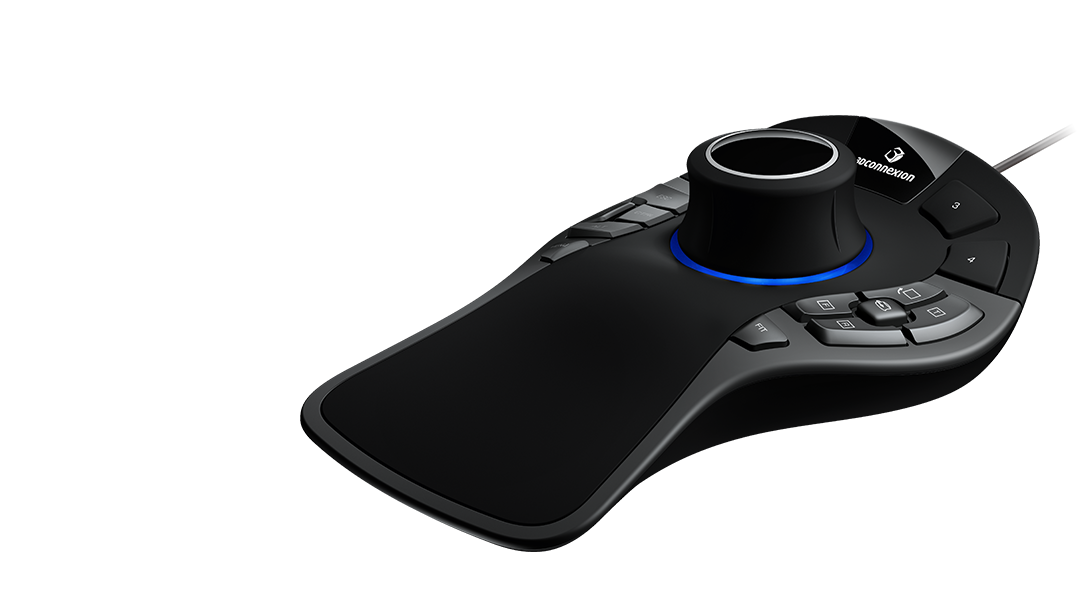
In this exercise you'll learn about basic navigation with the Space Mouse Pro in NX. Furthermore, we will show you different options for individually configuring it's hotkeys. (Figure "Space Mouse Pro")
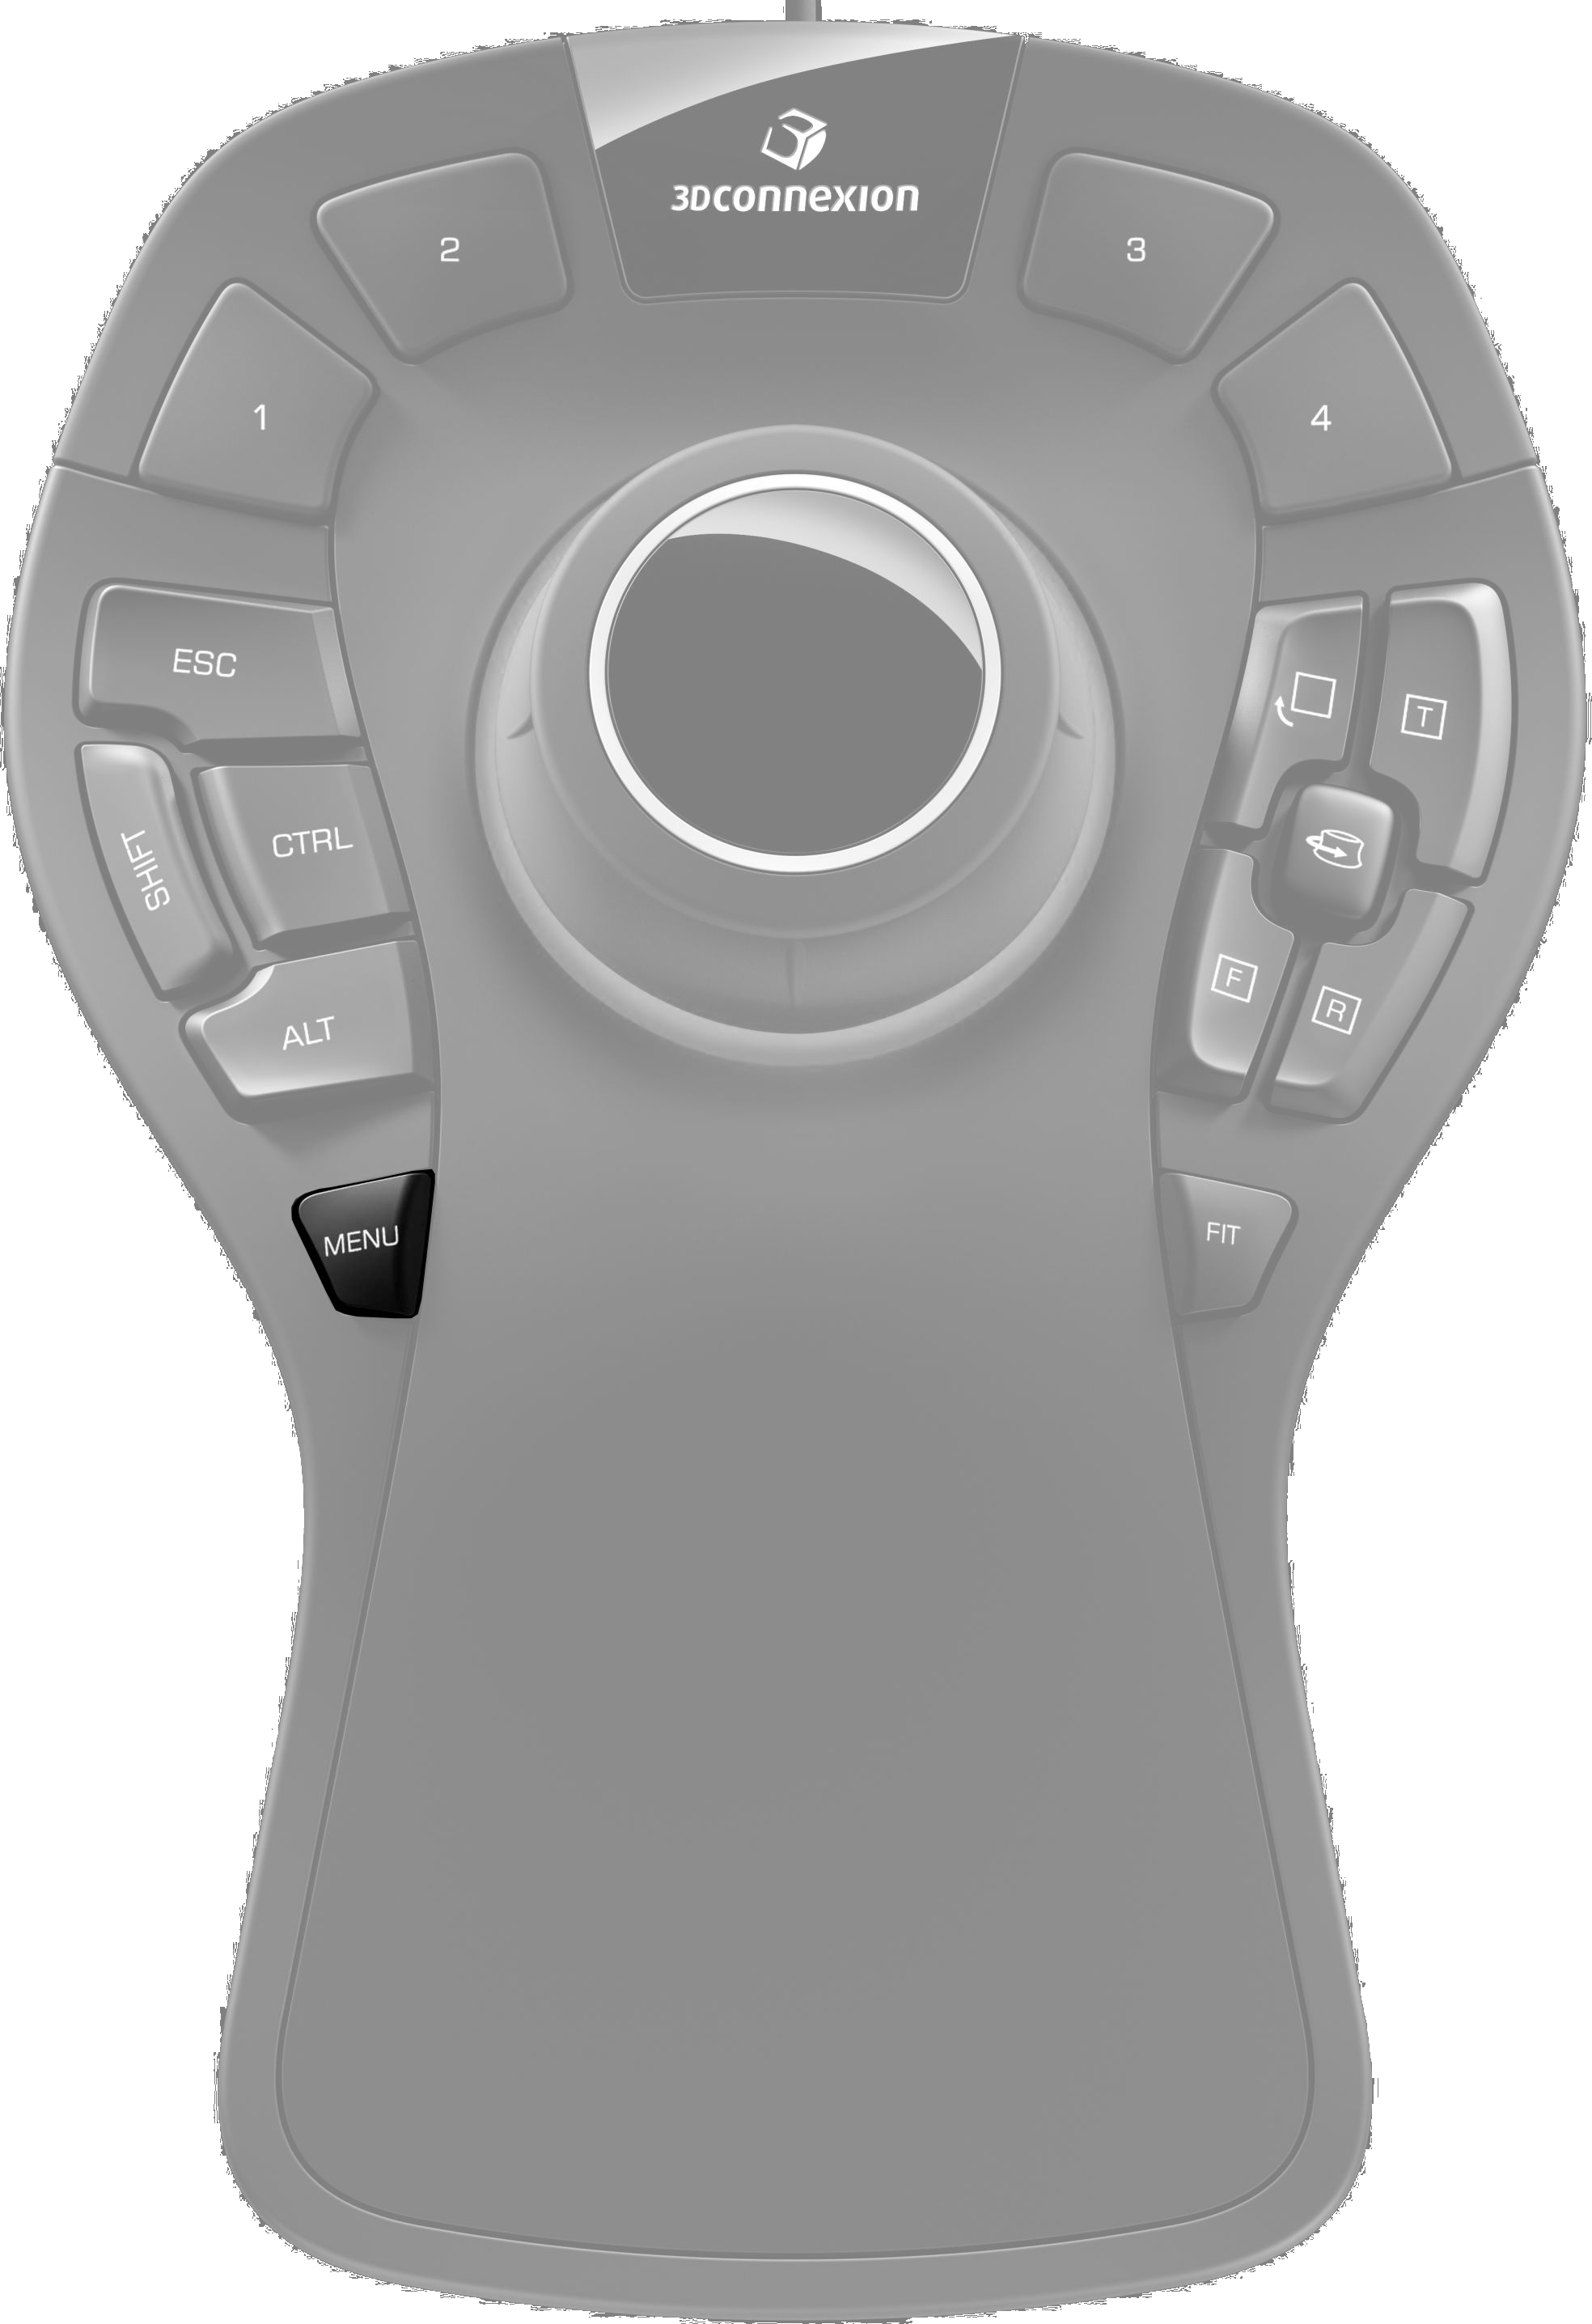
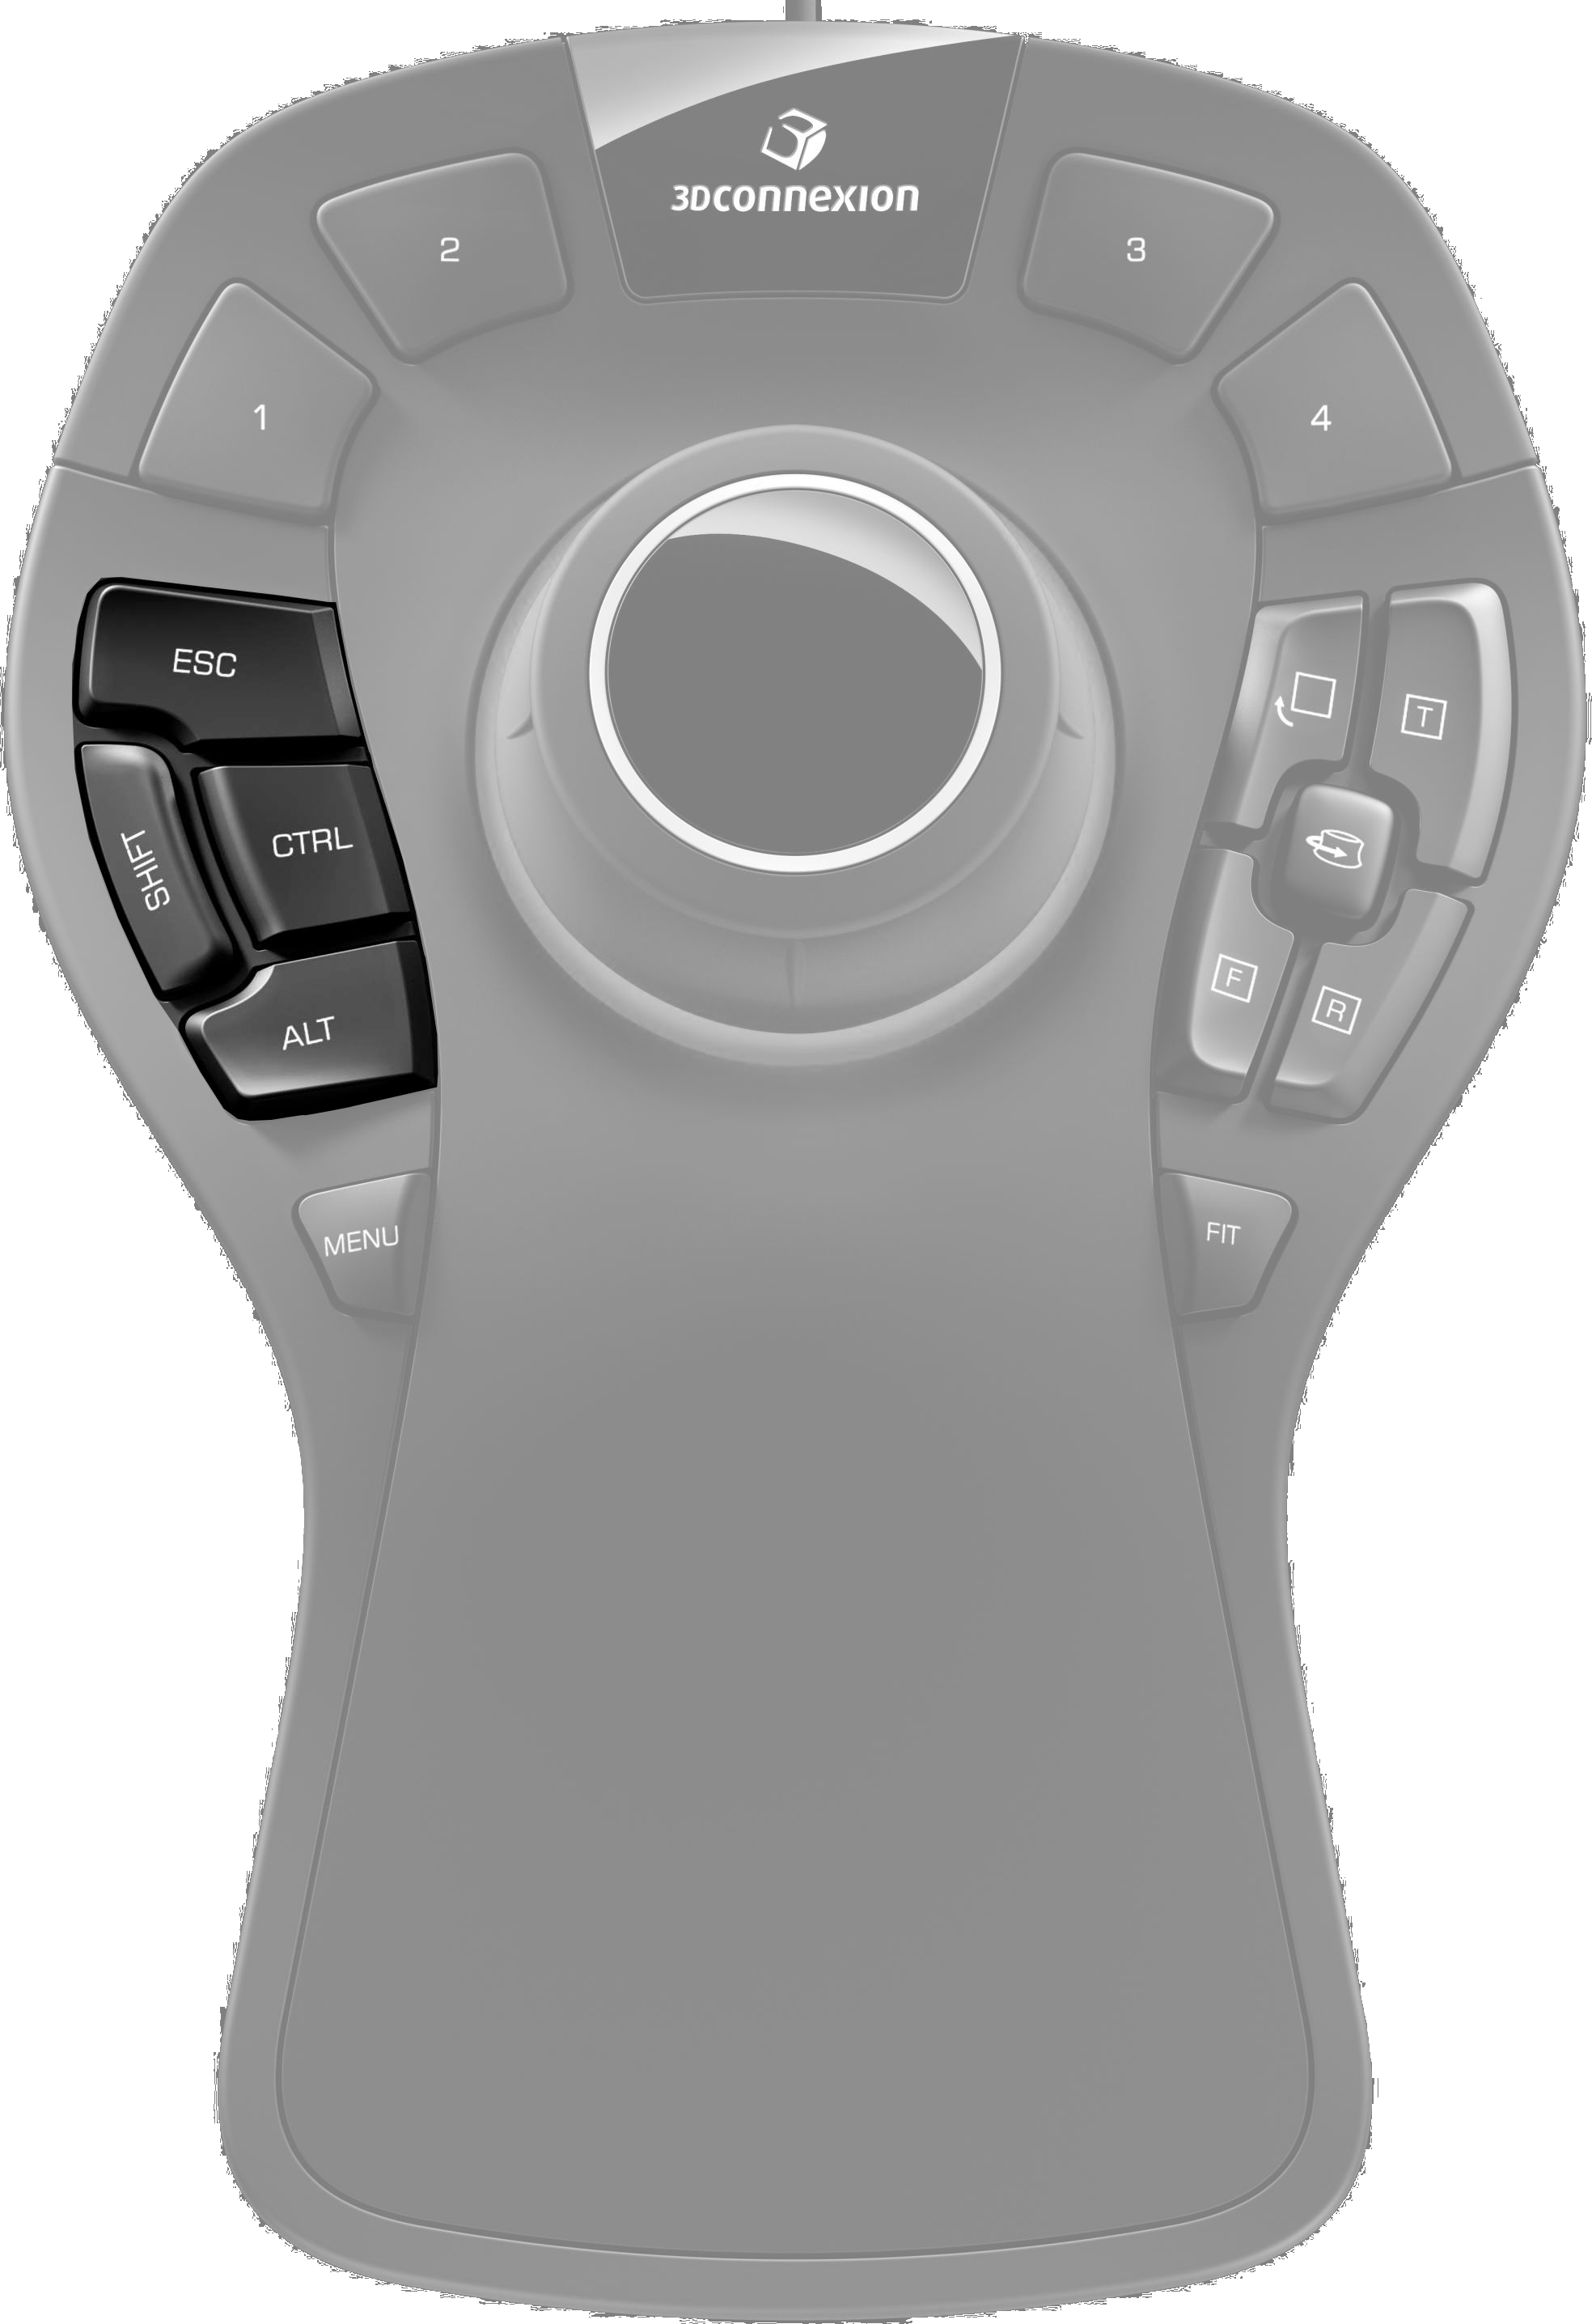
The menu button is located on the left below the cap of your Space Mouse
Pro (Figure "Menu button"). By clicking it, you
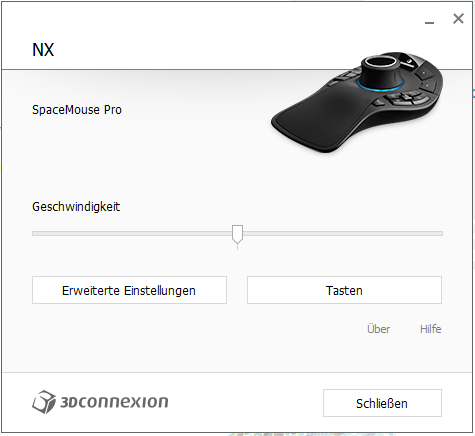
can open the main menu for configuring your Space Mouse (Figure "Main menu").
Here you can edit the functions of the different axes (Erweiterte Einstellungen), or edit the functions of every
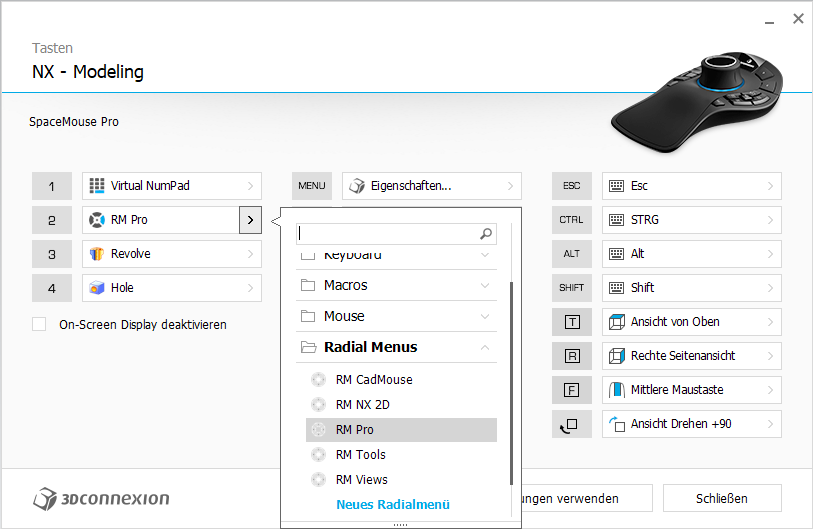
button on your Space Mouse Pro (Tasten).
Attention: The
Configuration of your Space Mouse is always dependent on the program you're currently
using! In order to configure the Space Mouse for NX's modeling mode, make sure that NX
in modeling mode is the active window before pressing the menu button! The program, for
which the Space Mouse is configured is always noted in the header of the menus (refer
pictures on the right).
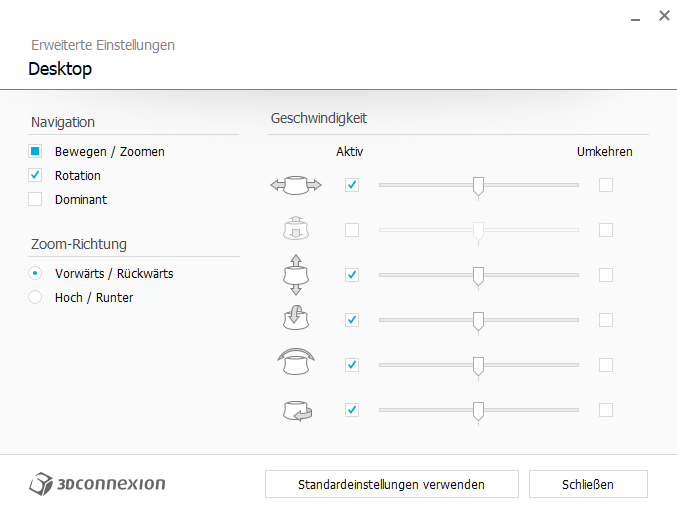
At first, choose Erweiterte Einstellungen. Here you can
invert, deactivate and adjust the speed of different axes of the cap. For easier
control, it is practical to only use the mouse for zooming in NX. For this, deactivate
the second axis from the top (Zoom-direction forwards/backwards - "Zoom-Richtung
Vorwärts/Rückwärts") (Figure "Erweiterte
Einstellungen").
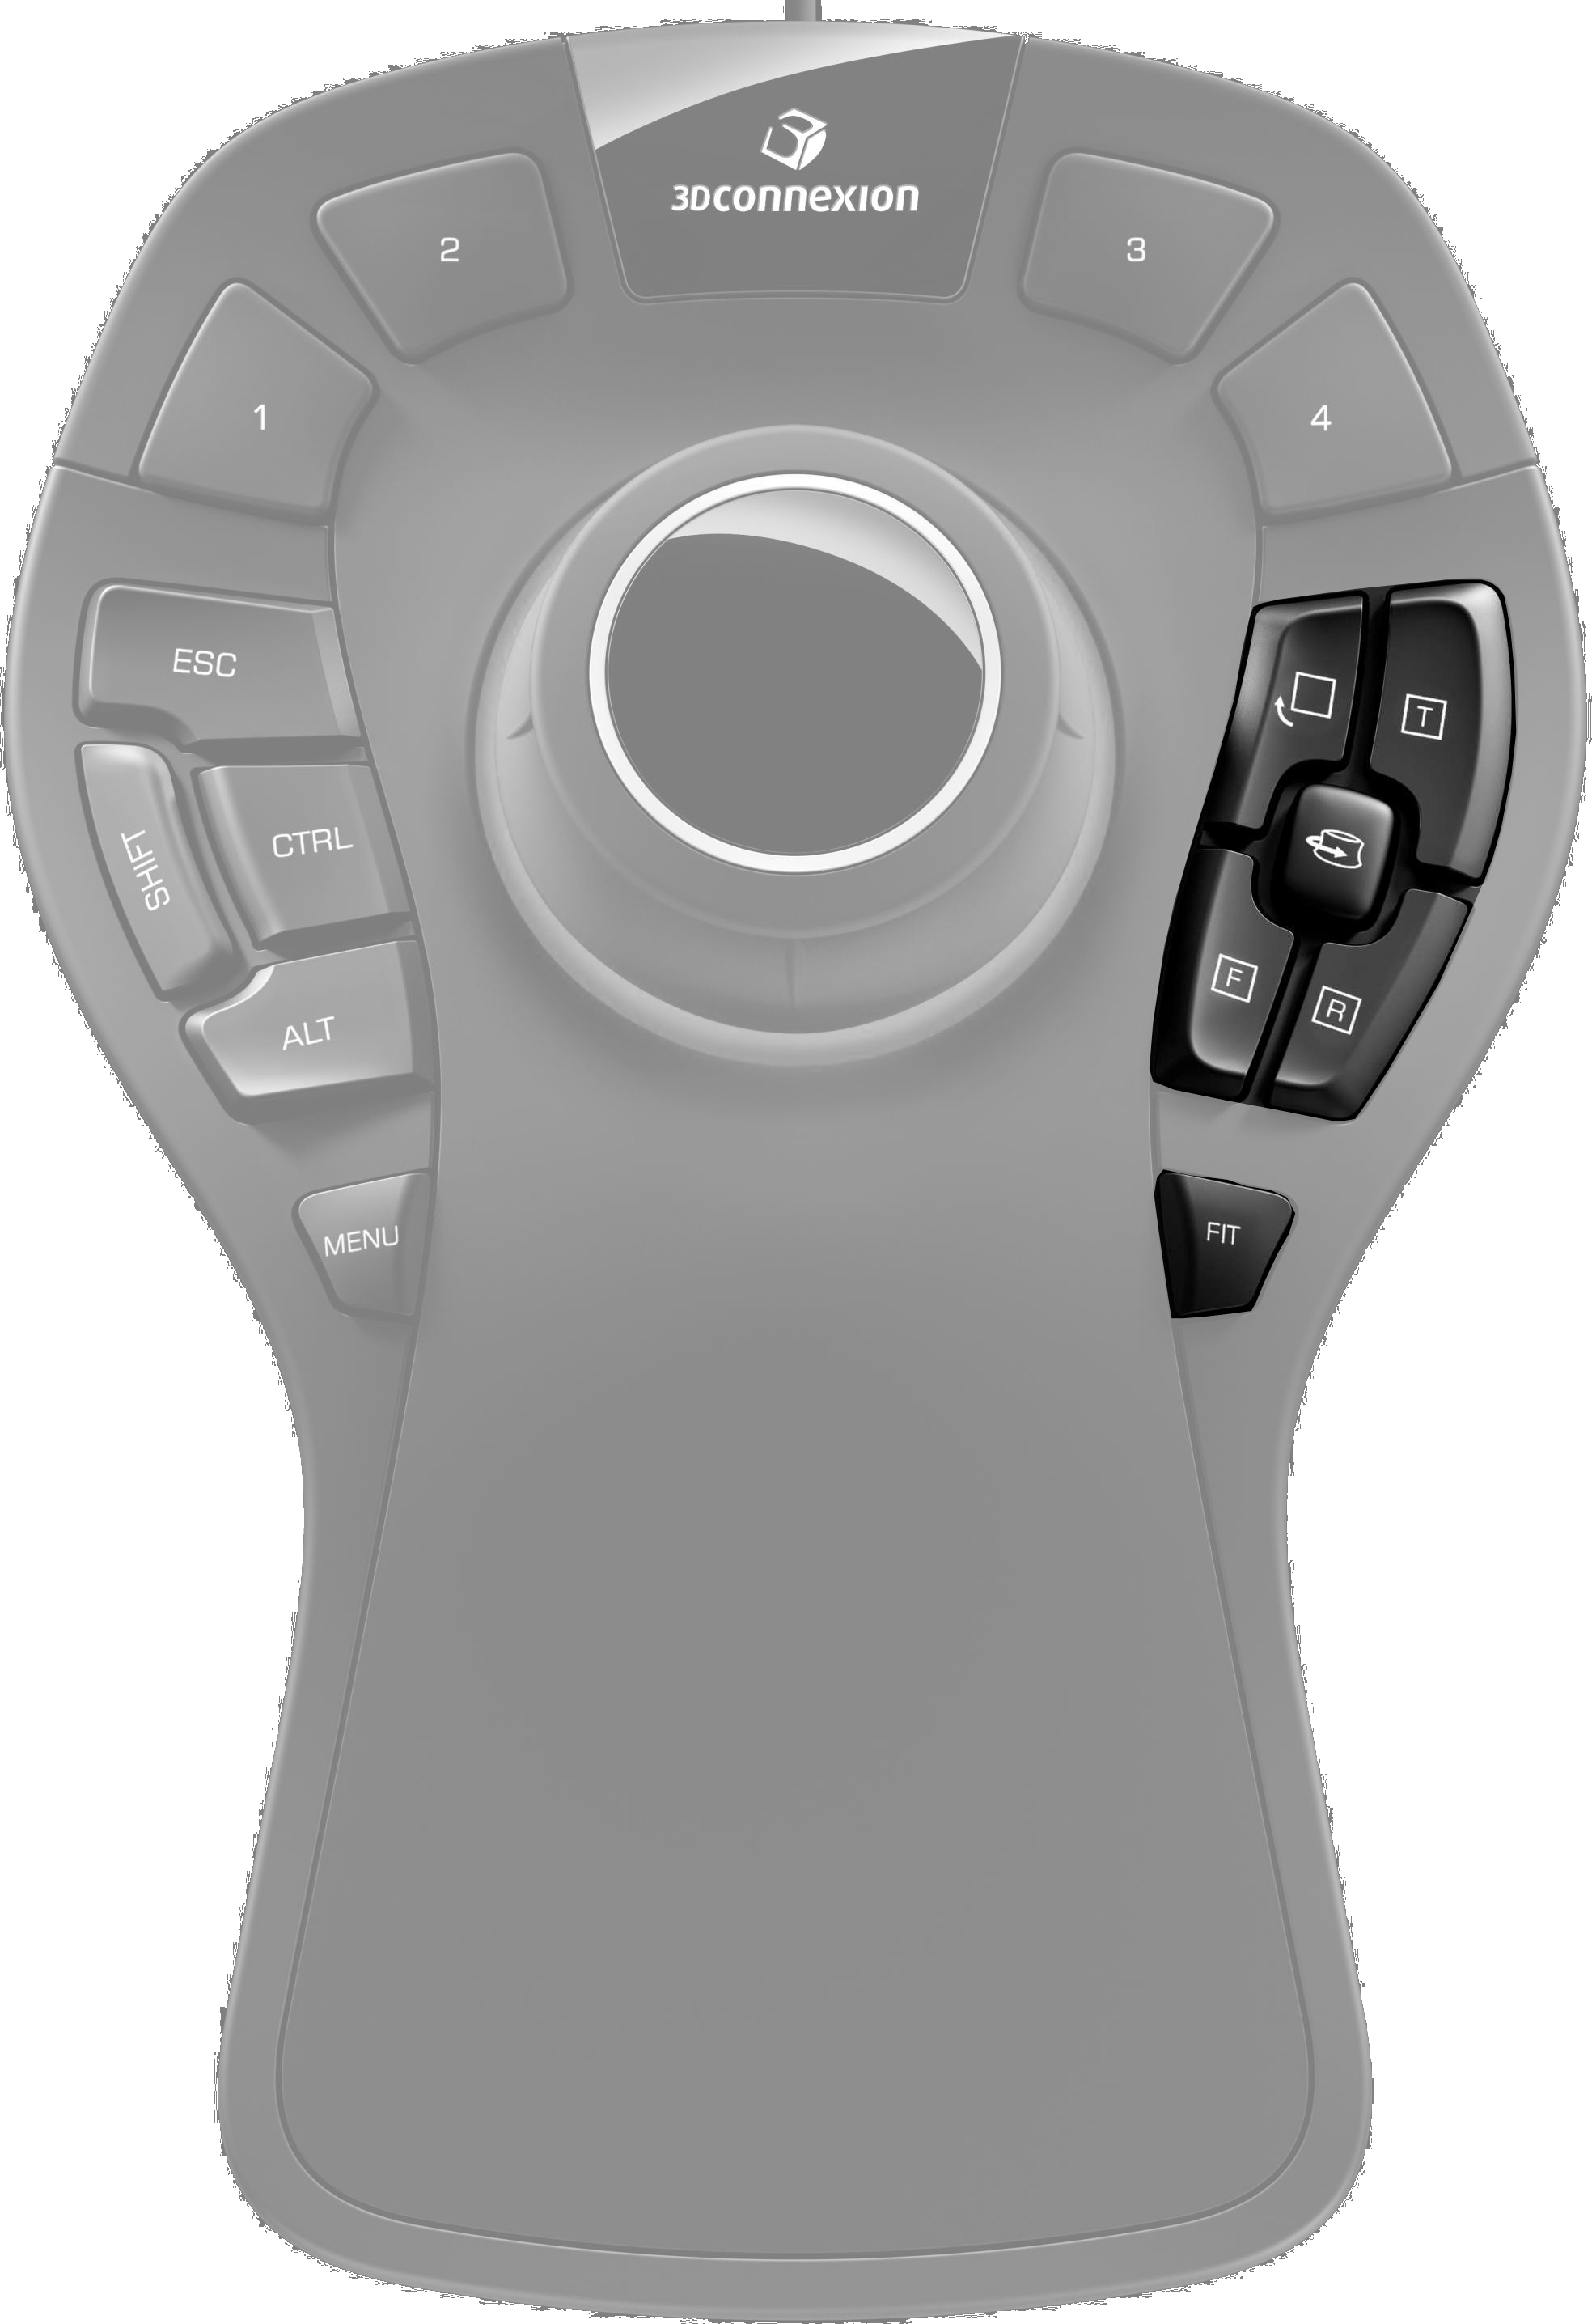
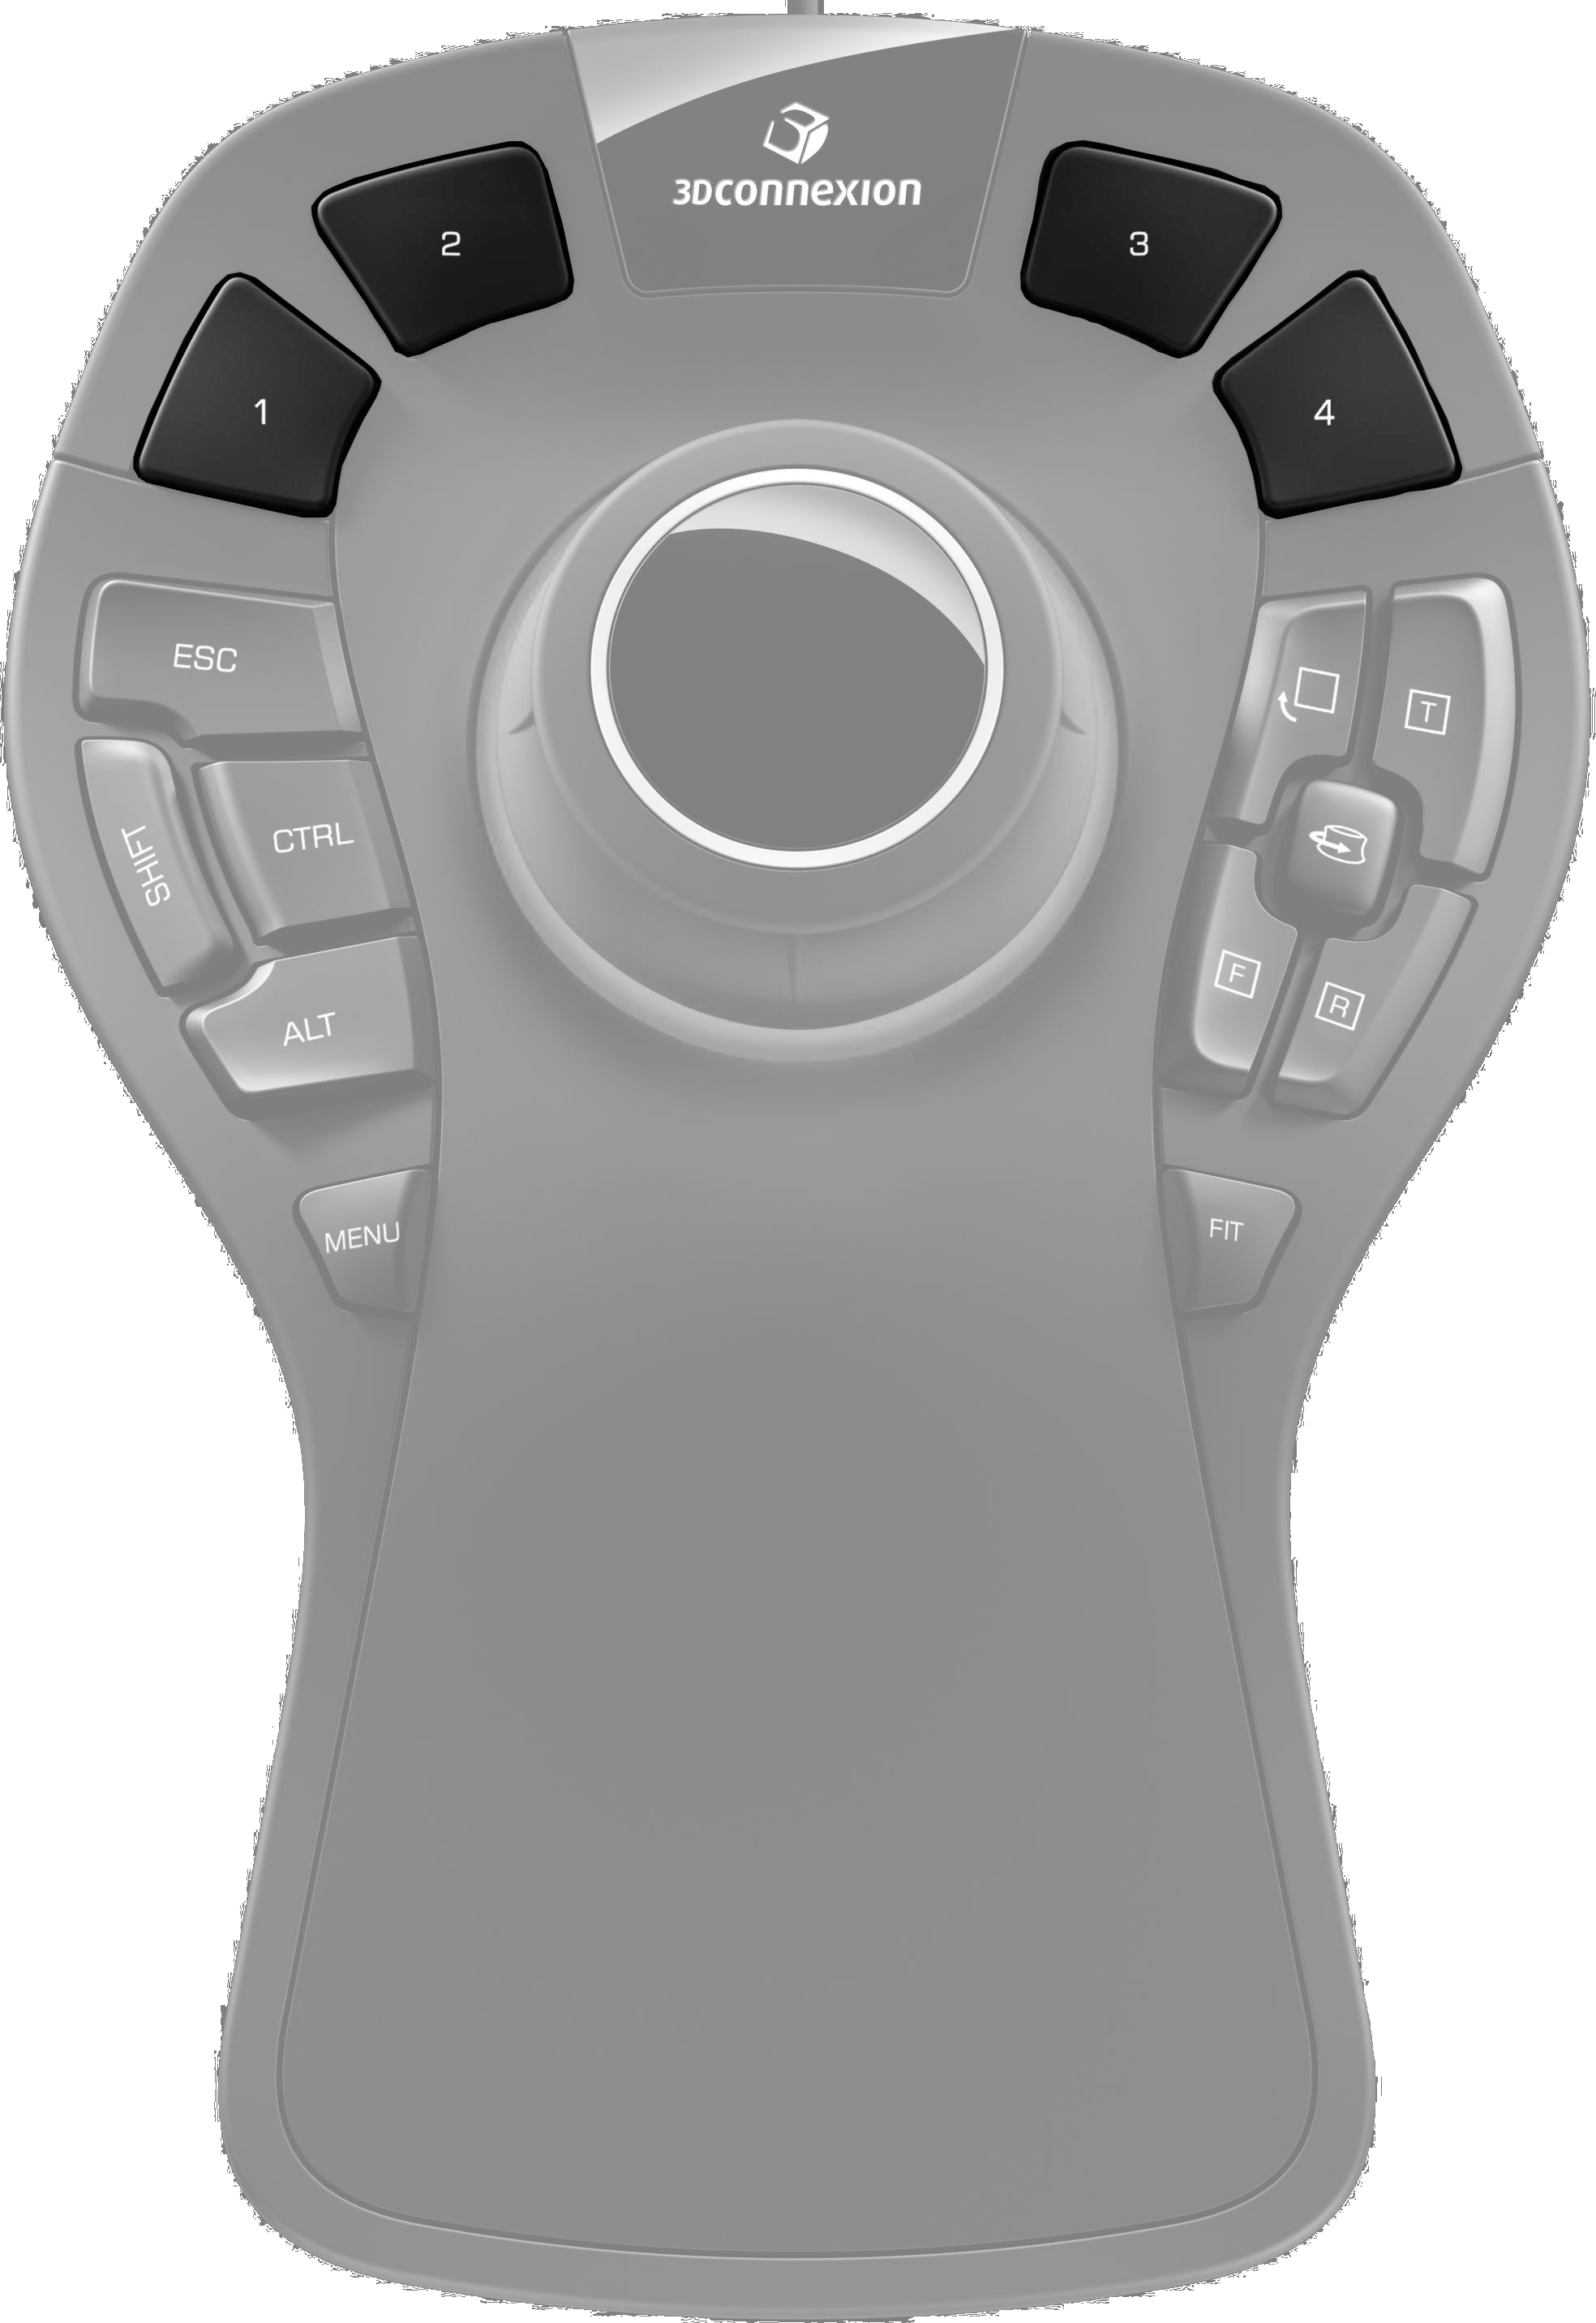
Additionally, various keyboard functions (Figure "Keyboard functions"), views from NX, like the previously explained function Fit (Figure "View buttons"), and four configureable hotkeys (Figure "Hotkeys") are located around the cap.
Generally, you can configure every Button with nearly any function by using the menu Tasten (accessed via the main menu). The following part focuses on the hotkeys and on the usage of radial menus.
Radial menus are similar to the context menu of NX. When pressing a button bound to a radial menu, it appears around the mouse cursor, offering different functions, that can easily be accessed without great mouse movement. The advantage of radial menus is that they allow you to bind up to 8 functions to one button.
Now you should configure hotkey 2 with a radial menu specific for the modeling mode of NX.
To do so, open the part uebungsklotz in NX, and make sure you're in modeling mode.
Now press the menu button (Figure "Menu button") and select Tasten.
To configure hotkey 2, click the arrow next to its field and choose Radial Menus -> Neues Radialmenü (Figure "Create new radial menu"). Here you can name your radial menu, choose if it should have four or eight options and configure these options.
Name your radial menu nx modeling.
Option 1 should now be bound to the function Sketch. To do so, click the arrow next to the field of option 1 and choose Sketch via NX -> Insert -> Sketch. Alternatively, you can search "Sketch" using the field on top of the dropdown menu (Figure "Adding Sketch").

Do the same for adding the function hole to option 2. Unlike Sketch it is located in NX -> Insert -> Design Feature -> Hole.
Skecht and Hole are essential functions for working with NX and will later be explained in chapter 4.1.1 Sketch and 4.2.3.1 Hole.
Once you have completed all of the steps above, close the Space Mouse's menus.
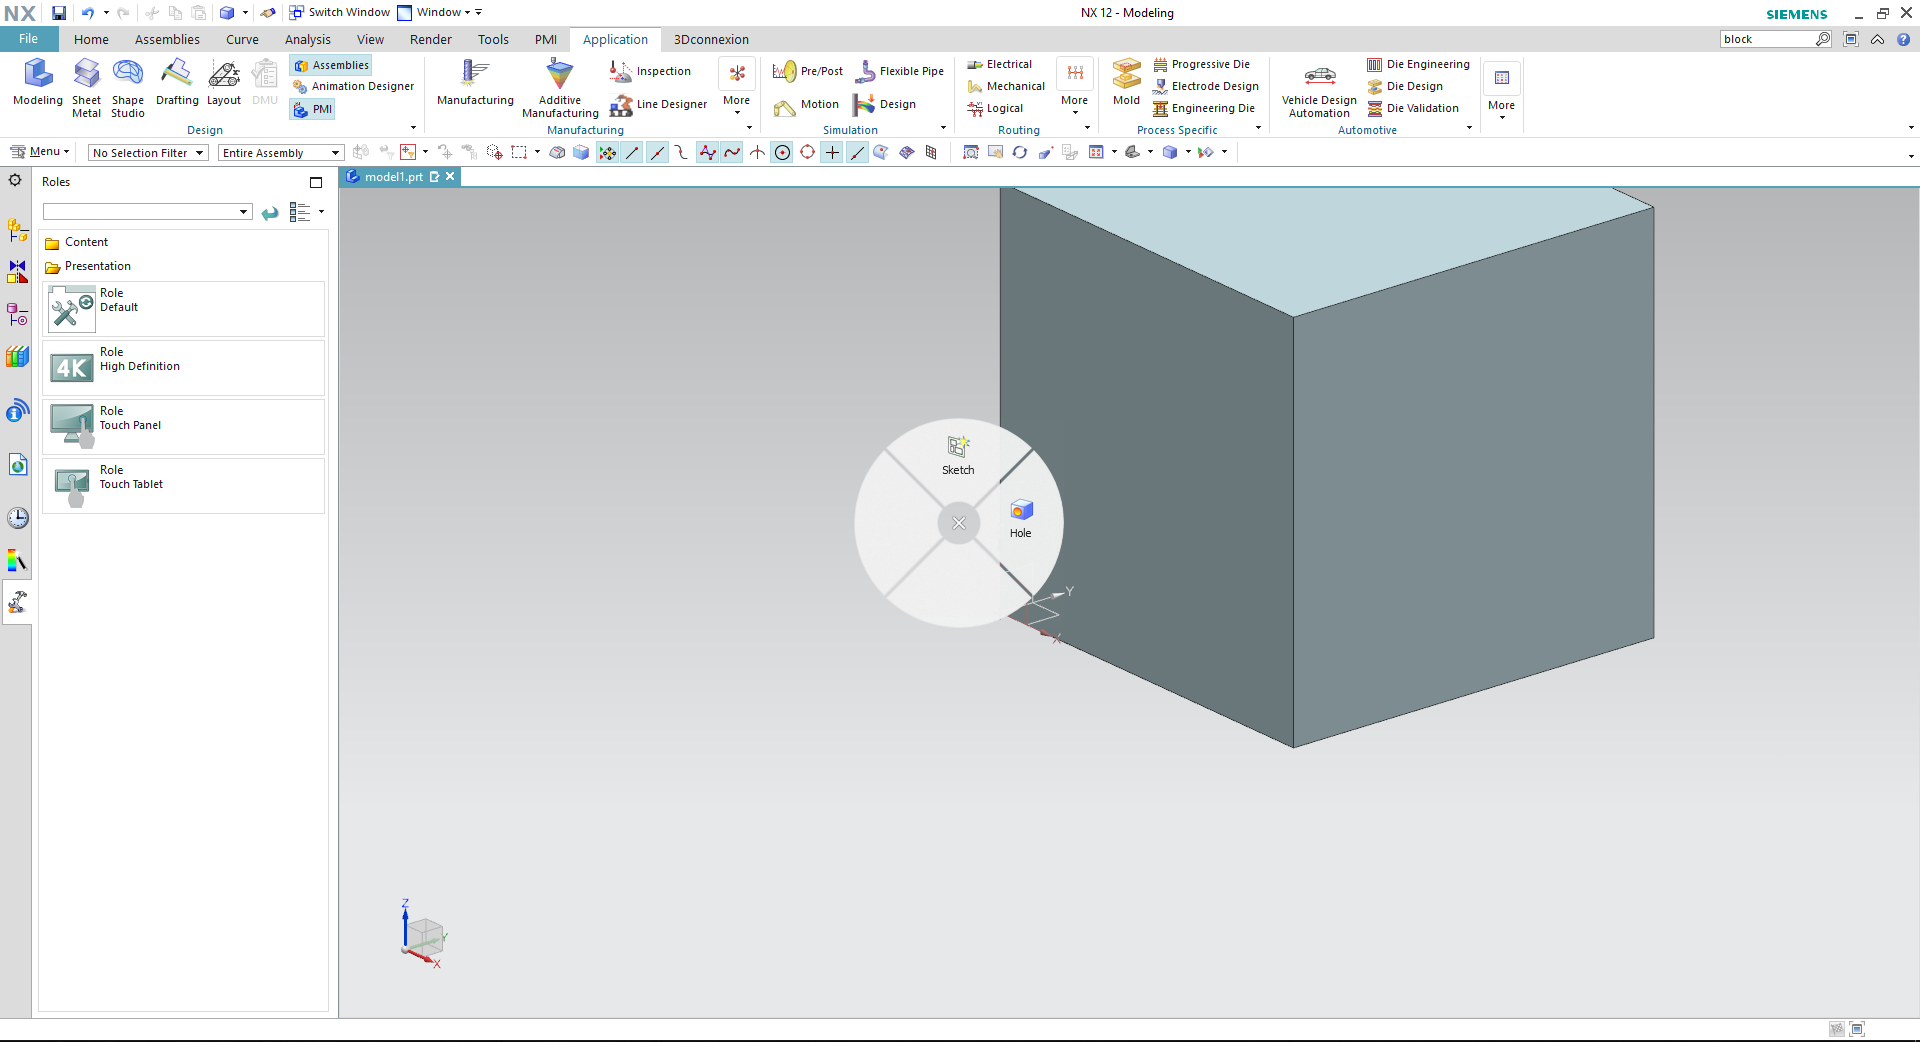
If you now press hotkey 2 while using NX's modeling mode, your radial menu should appear around your cursor, like shown in the picture on the right (Figure "Radial menu finished"). By clicking one of the configured options, the function bound to it should pop up.
| Attention: |
|