Today's 3D CAD programs are characterized by bi-directional associativity. This means: A change to the model is copied directly into the drawing. In this lesson you will try it out with an exercise. To do this, use the drawing you have just created and the spacer_tpd master model.

- First switch back to modeling mode by using the Window menu in the menu bar to switch to the spacer_tpd master model and then switch to Modeling via file.
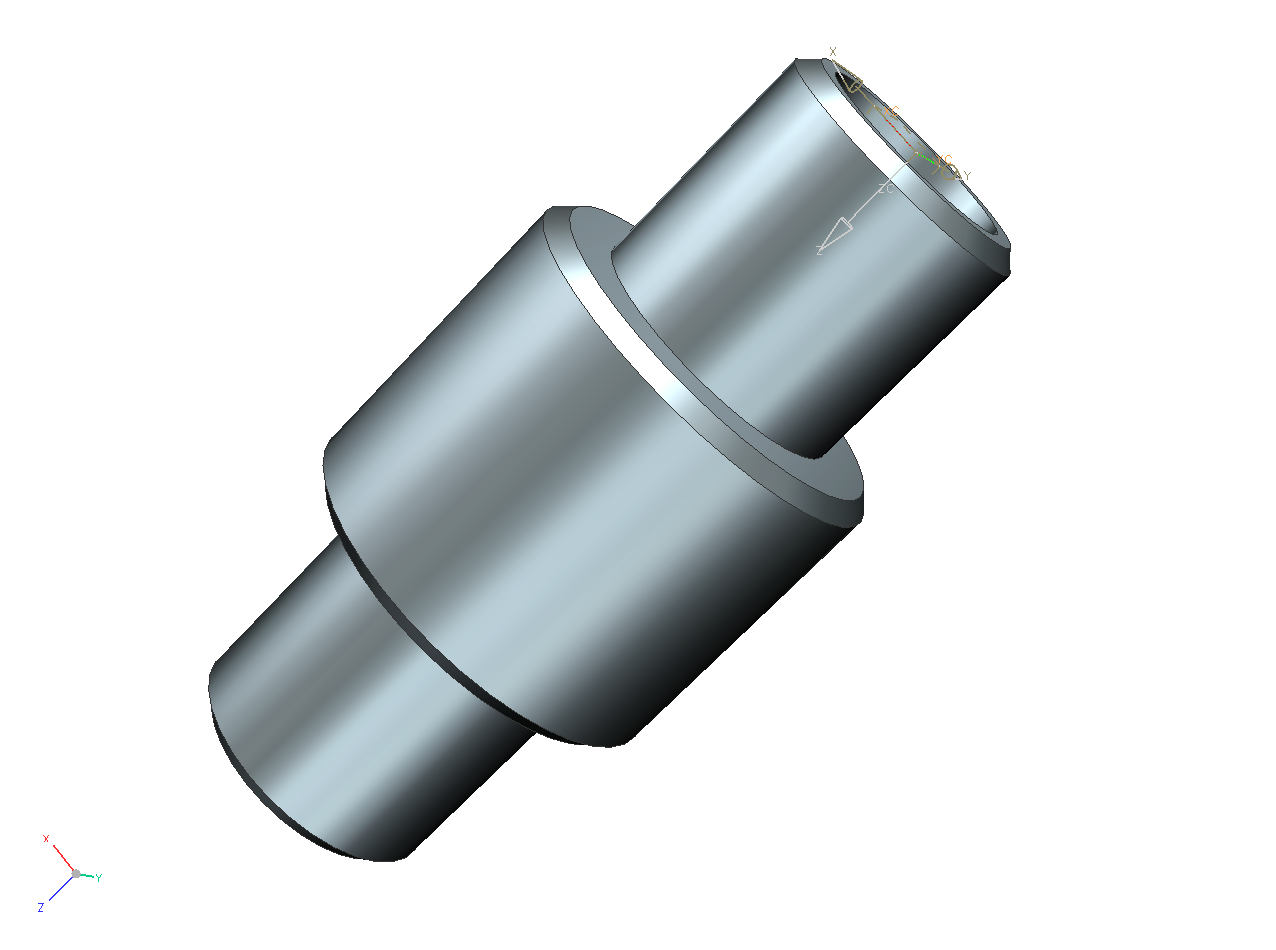
- In the model, add a chamfer of 0.5 x 45° to each outer edge. Your model should now look like the figure (see figure "Spacer with chamfer").
- Now switch back to the specification via the Window menu. NX has automatically adopted the changes from the master model.
- Change into Drafting Mode (File -> Drafting).
- The red mark in the Part Navigator indicates that the derived views are no longer up to date.
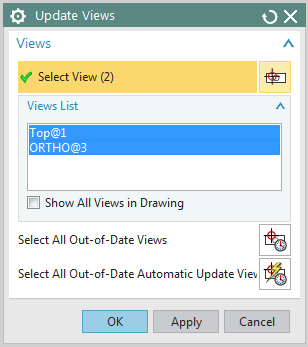
- Choose the Update Views
 function under View (Drafting).
 - In the Update Views window, the two views have already been selected automatically. Confirm with OK. (see figure "Update Views")
NX now updates the selected views.
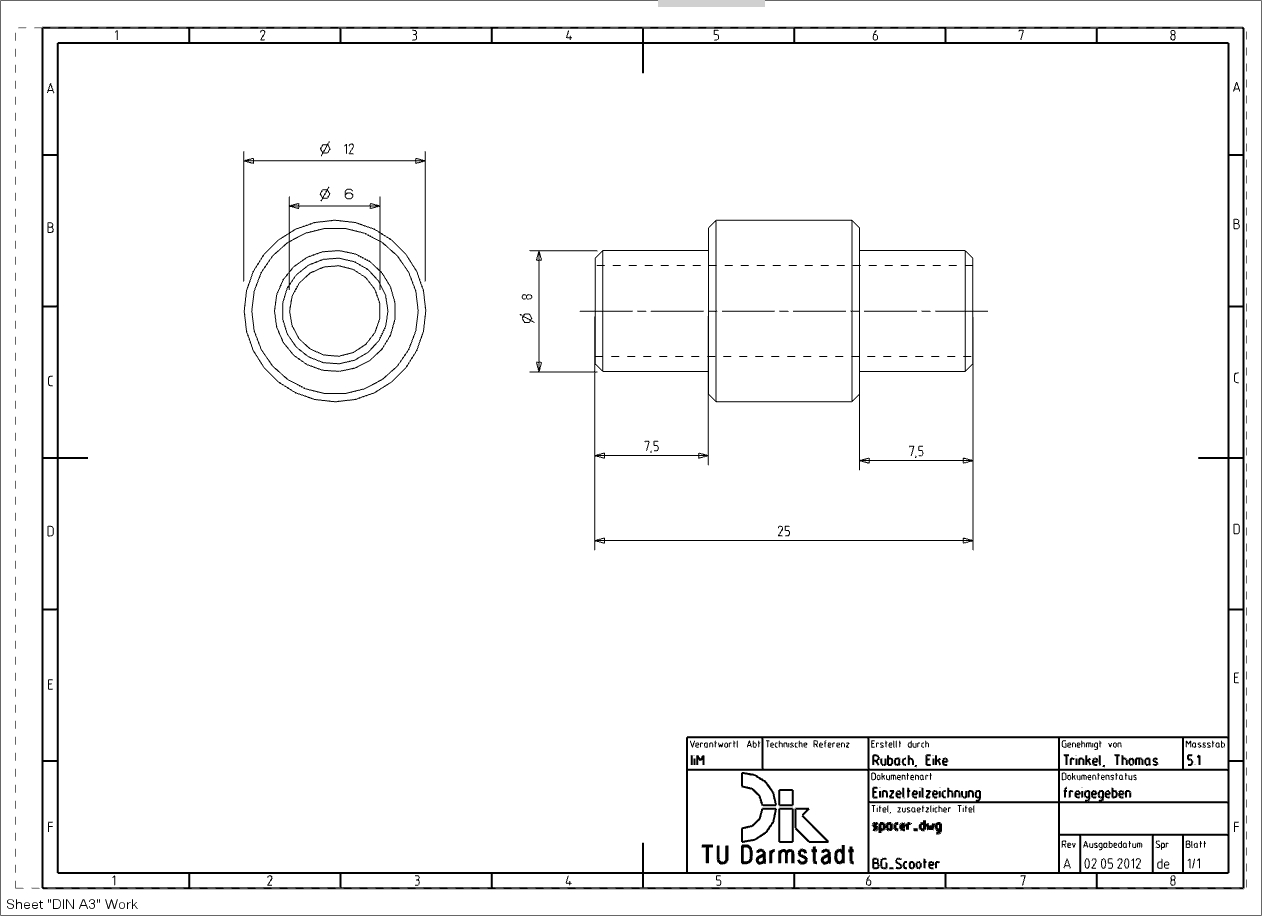
Your drawing should now look like the illustration (see figure "Before" ).
To adopt the dashed dimensions, proceed as follows:
- Preferences -> Drafting -> General/Setup -> Retained Annotations.
- In the dropdown menu switch from - - - - to Original.
- Confirm with OK. The dashed dimensioning is now displayed again as the original dimensioning. (see figure "Afterwards")
| Attention: | Do not rely on the accuracy of the updated dimensions! It is better to check the correctness of all measurements after updating! |