In this exam you'll learn about the function Pattern Feature. It enables you to arrange and repeat form features in patterns.
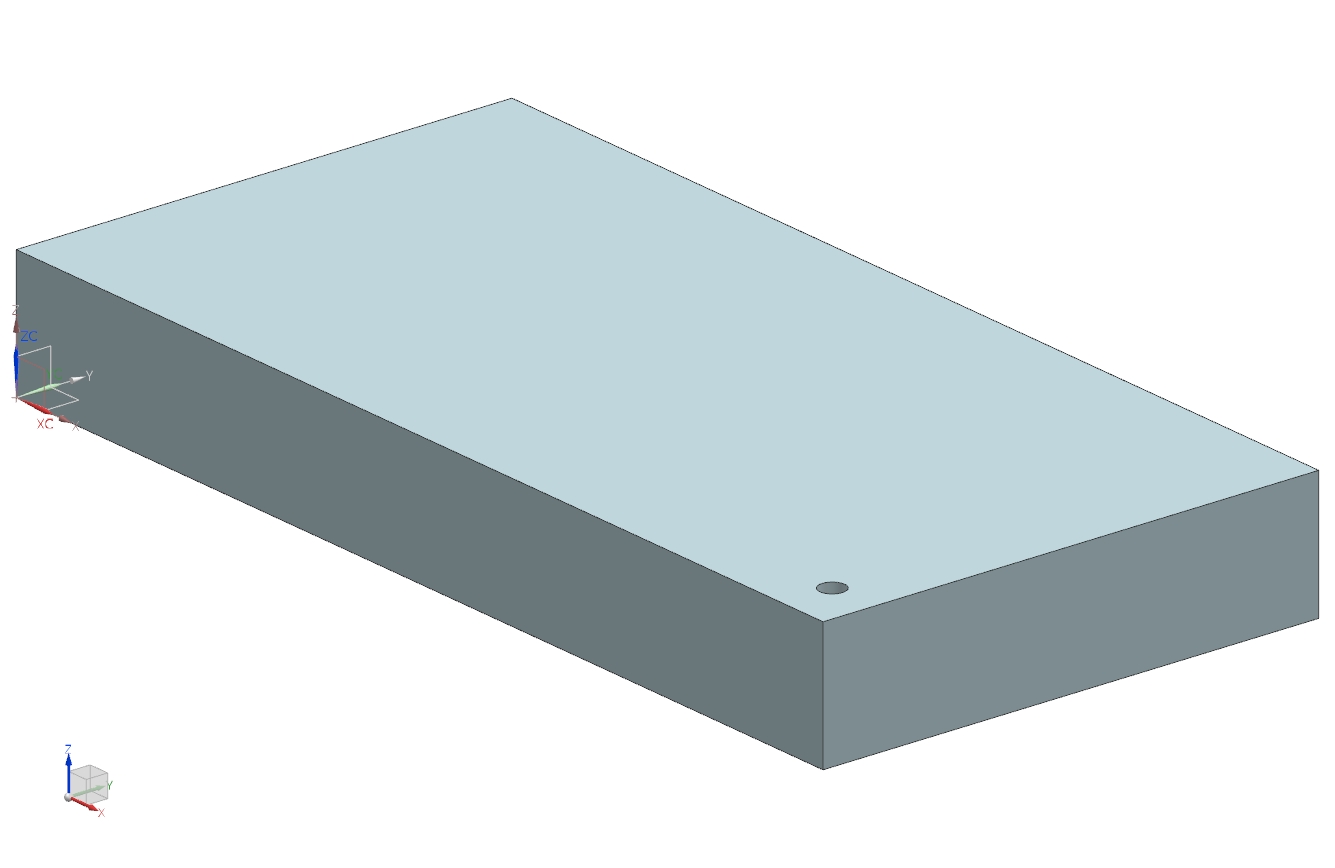
Create a new model with the name Pattern_Feature according to the naming convention. Create a block with the dimensions 400mm x 200mm x 50mm and drill a simple through-body hole with a diameter of 10mm and distance of 20mm from its center. (refer figure "Block with hole")
Pattern in one direction
First, you should pattern the hole along an edge. Select Pattern Feature ![]() . Select the hole by clicking it within the part navigator in the 3D-model as Feature to Pattern.
. Select the hole by clicking it within the part navigator in the 3D-model as Feature to Pattern.
| Hint: |
|
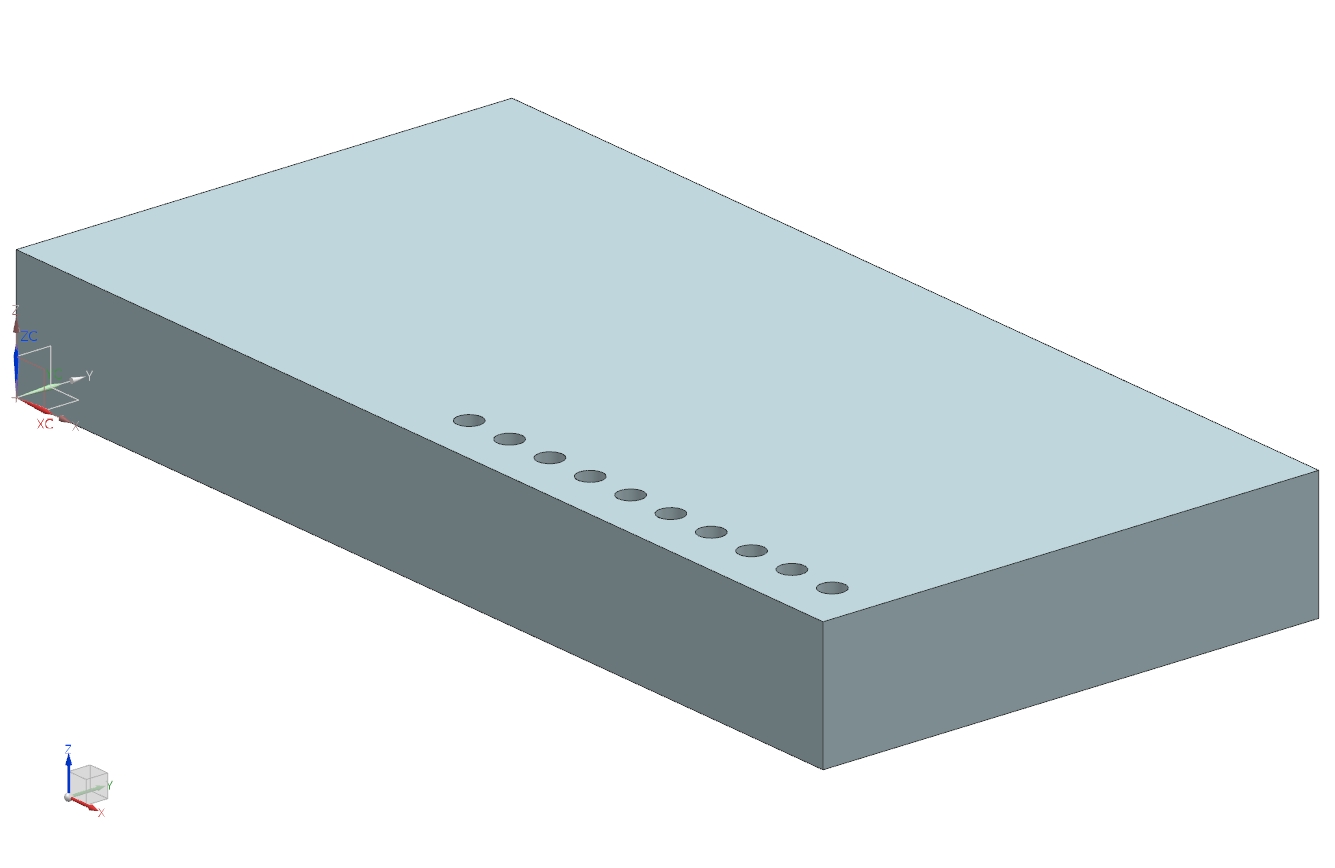
Below Pattern Definition, select the layout ![]() . Now click Specify Vector and select the Vector along the long edge of the block. You can - if necessary, change its direction via
. Now click Specify Vector and select the Vector along the long edge of the block. You can - if necessary, change its direction via  . You can adjust the number of repetitions and their distance to each other with
 ![]() . In this case you should add 9 holes with a distance of 20mm to each other.
. In this case you should add 9 holes with a distance of 20mm to each other.
Note that the feature to pattern is also counted in. Confirm by clicking OK.(refer figure "Pattern in one direction")
| Hint: |
|
Rectangular pattern
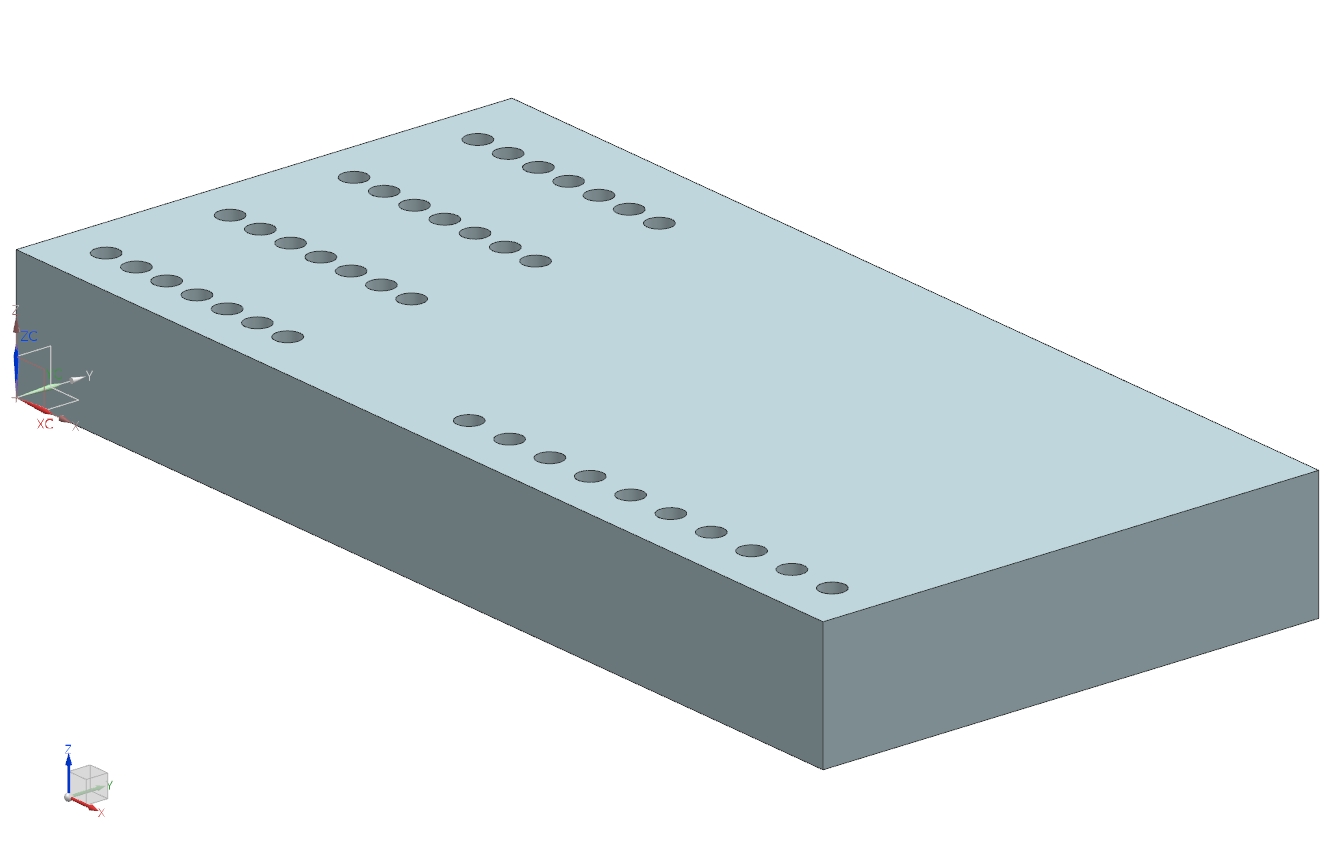
Now you should create a rectangular array of holes. Create a new through-body hole with 10mm diameter in another corner of the block. The distance to the edges should be 20mm as well. (refer figure "Rectangular pattern") Choose Pattern Feature ![]() again and select the hole you just created as feature to pattern. Choose the layout
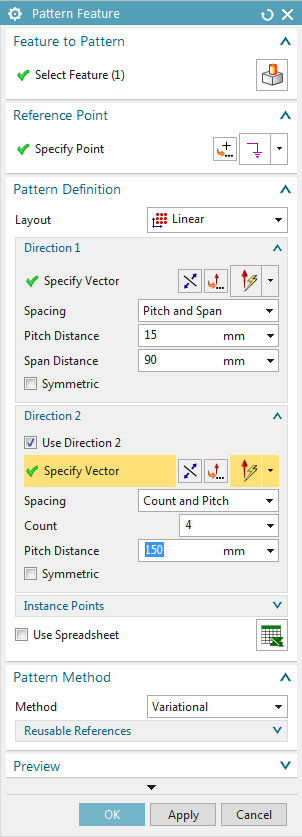
again and select the hole you just created as feature to pattern. Choose the layout ![]() Pattern Definition and create an array in the XY-plane with the dimensions 90mm x 150mm. The holes in X-direction should have a distance of 15mm to each other, the array should consist of 4 holes in Y-direction.
Pattern Definition and create an array in the XY-plane with the dimensions 90mm x 150mm. The holes in X-direction should have a distance of 15mm to each other, the array should consist of 4 holes in Y-direction.
To do so, select the vector in X-direction as Direction 1. Select ![]() and enter 15mm as pitch and 90mm as span.
and enter 15mm as pitch and 90mm as span.
You'll need a second vector to create an array. Check the box for Use Direction 2 and select the Y-axis as second vector. Select ![]() to enter the number of holes and span. Enter 4 as count and 150mm as span. (refer figure "Pattern Feature")
to enter the number of holes and span. Enter 4 as count and 150mm as span. (refer figure "Pattern Feature")
Confirm by clicking OK.(refer figure "Rectangular pattern")
Circular pattern

Create a new 10mm through-body hole in the middle of the block. Again, choose Pattern Feature ![]() . Select the hole you just created as feature to pattern and select
. Select the hole you just created as feature to pattern and select ![]() . You now have to specify the vector that you want to pattern around. In this case choose the Z-axis. As point you should define the midpoint for your pattern - enter x = 200mm, y = 120mm, z = 50mm. Below angular direction you'll find multiple options similar to linear layout. Create 8 holes with equal pitch around the midpoint. (refer figure "Circular pattern")
. You now have to specify the vector that you want to pattern around. In this case choose the Z-axis. As point you should define the midpoint for your pattern - enter x = 200mm, y = 120mm, z = 50mm. Below angular direction you'll find multiple options similar to linear layout. Create 8 holes with equal pitch around the midpoint. (refer figure "Circular pattern")
| Hint: |
|