In this exercise you'll learn how to assign a color to a model.
Use the model boss from the exercise you just completed.
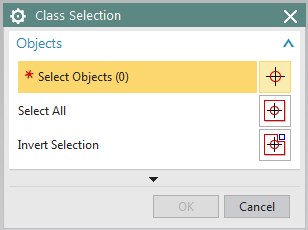
You can open the window Class Selection by clicking Edit -> Object Display or by pressing Strg + J. (refer figure "Menu Class Selection")
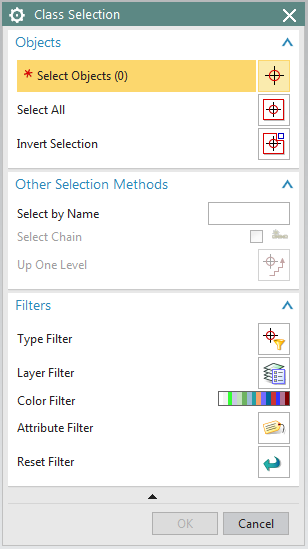
Here you can select sections of your model you want to color by clicking them or selecting them within the Part Navigator. Confirm by clicking OK.
If you only want to color specific surfaces of your model, open the tab "Filters" and choose "Type Filter". If you adjust it to "Face" you can select single surfaces. (refer figure "Class Selection")
Now the window Edit Object Display pops up, (refer figure "Edit Object Display"),
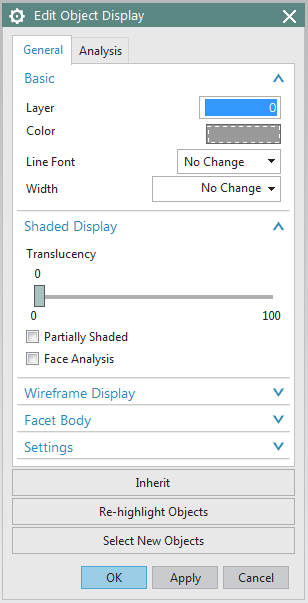
in which you can open the window Color by clicking the colored surface. (refer figure "Color")
Here you can select one of the default colors or you can display and select additional colors by choosing the tab "Palette". Alternatively, you can enter the ID of the desired color.
You can also complete the following steps:
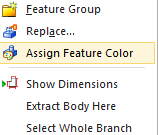
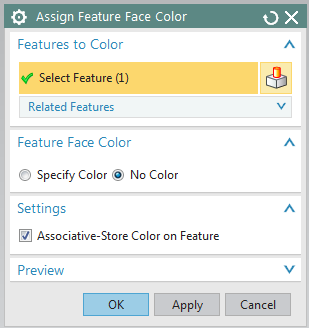
Click the feature you want to color within the part navigator with the RMB and choose Assign Feature Color(refer figure "drop-down menu").
The window Assign Feature Face Color pops up. (refer figure "Assign Feature Face Color")
Now click every additional feature you want to color as well, in this case every one.
In Feature Face Color, select the option Specify Color.
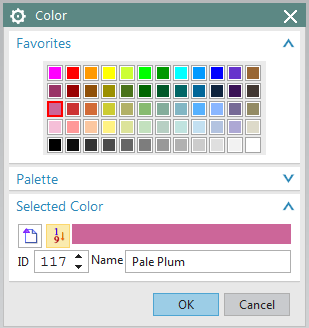
Click the colored area that appears on the right. The window Color pops up. (refer figure Abbildung "Color")
Select the desired color. You can also enter the ID of your desired color, e.g. enter ID 117 for "Pale Plum".
Confirm by clicking OK.
Now also confirm the window Assign Feature Color with OK.
Your model is now colored Pale Plum!