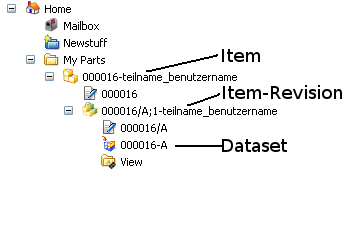
Now you'll learn how to create a new Item. You can think of an item as a kind of a package, that contains all the relevant data for an object, like an assembly or a model. Teamcenter uses the yellow icon pictured on the right.
An Item contains different development stages of a Model, called Revisions. An Item-Revision is a sub-group of an Item; there can be more than one Revision. Teamcenter uses the green/yellow icon pictured on the right.
Inside every item-revision there are Datasets. A part-file, for example, contains the actural geometric data. Teamcenter uses orange/blue icons for that. Later, you'll learn about a Dataset called Specification, in which draft data is saved.
You can see the tree Item-Revision-Dataset here: (figure "Item-Revision").
The identification of an item is composed of two parts:
- The Item-ID is a six-figure number that identifies an item exactly within the database. Every possible Item-ID can only be used once.
- The Item-Name is only used for identification by a user. An Item-Name can not be used for exact identification and can be used for multiple items with different Item-IDs, and can be changed at will.
Revisions add their identification (A, B, C, ...) to the Item-ID (e.g. 000580/A-model name_user name). Inside the Revision, respective part-files are only named with the Item-ID and Revision number (e.g. 000580/A).
Creating a new Item in NX
Now create a new Item in NX.
Open NX via  . Make sure, that no item or folder is marked (highlighted in blue). Otherwise, hold Strg and klick on the marked object. It should be unmarked now.
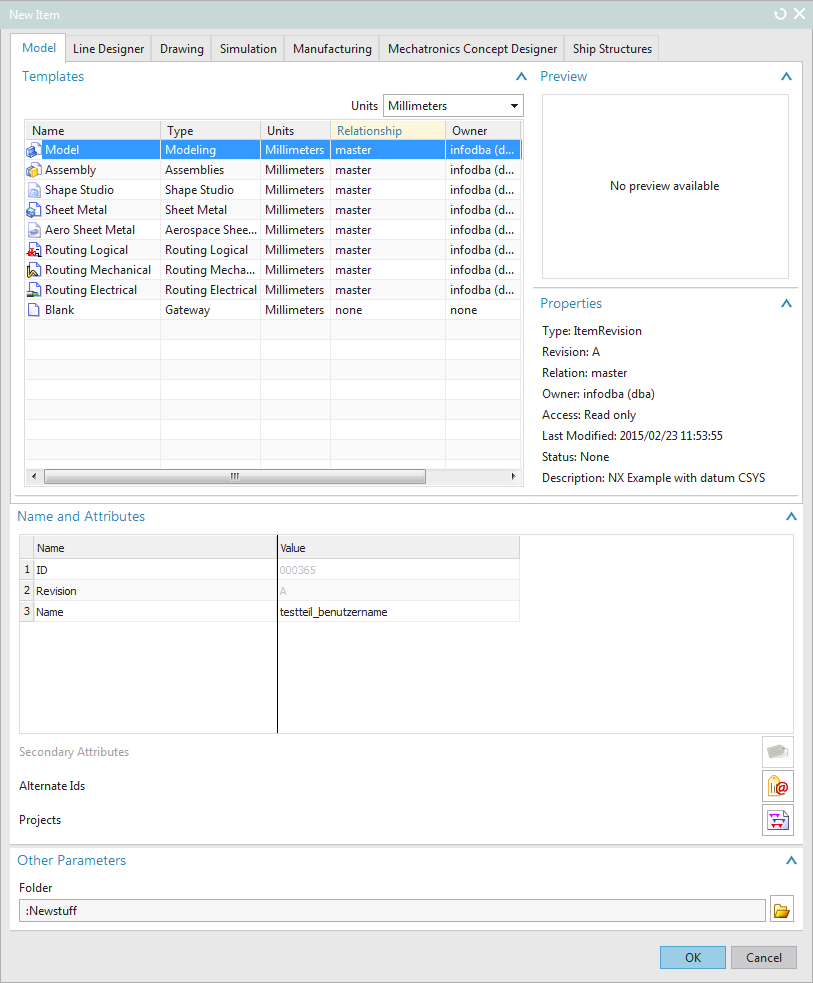
In NX, click File -> New -> Item  . This Menu pops up: (figure "New File"). For this Example choose the tab Model.
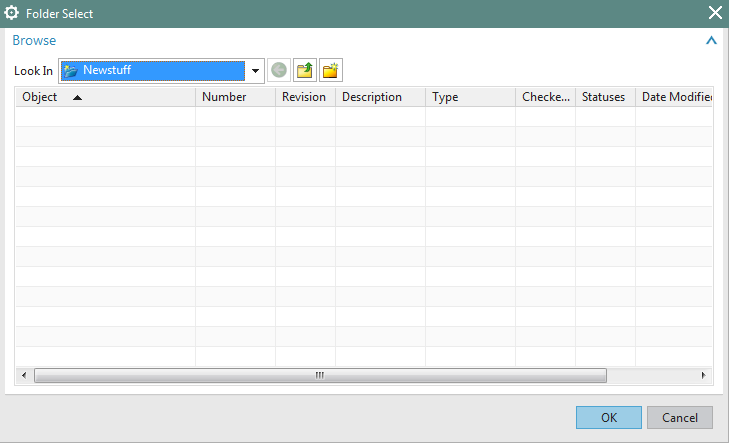
ID and Revision are filled in automatically as soon you double click the field below Value. You now have to choose the folder, in which you want to create the new item. To do so, click ![]() below Other Parameters. Now, the window Folder Select opens. In there you can select your folder Home next to Look In. All your folders are listed in the window below. Now choose the folder, in which you want to save your new item. Confirm by clicking OK. (figure "Folder Select")
below Other Parameters. Now, the window Folder Select opens. In there you can select your folder Home next to Look In. All your folders are listed in the window below. Now choose the folder, in which you want to save your new item. Confirm by clicking OK. (figure "Folder Select")
In Templates below the tab Model you can select different types of files/items:
- Model: With this you can create single objects in NX. You always choose this option if you are told "create a new item in NX" ("Erzeugen Sie ein neues Teil in NX").
- Assembly: With this you can create assemblies, composed of multiple separate objects. You always choose this option if you are told "create an assembly" ("Erzeugen Sie eine Baugruppe").
If you want to create a draft derived from a model, click the tab Drawing. You can select different templates in the tab Drawing within Templates, e.g.:
- A4 - DiK: This creates a drawing in DIN A4, vertical format.
- A3 - DiK: This creates a drawing in DIN A3, horizontal format.
- A3 - DiK - Stueckliste: This creates a drawing with parts list in DIN A3.
We now choose Model, since we want to create one.
Choose the name bauteil, by typing it in the field Name (select via double click). Make sure you use the naming convention. (see Chapter 1.3 "Naming convention")
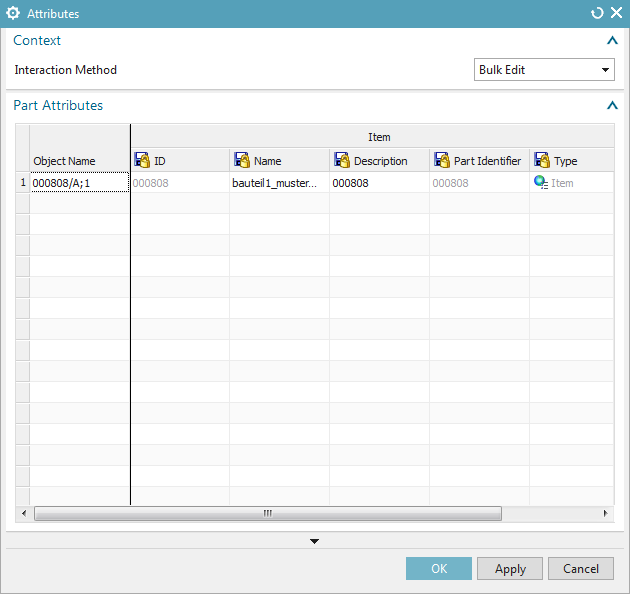
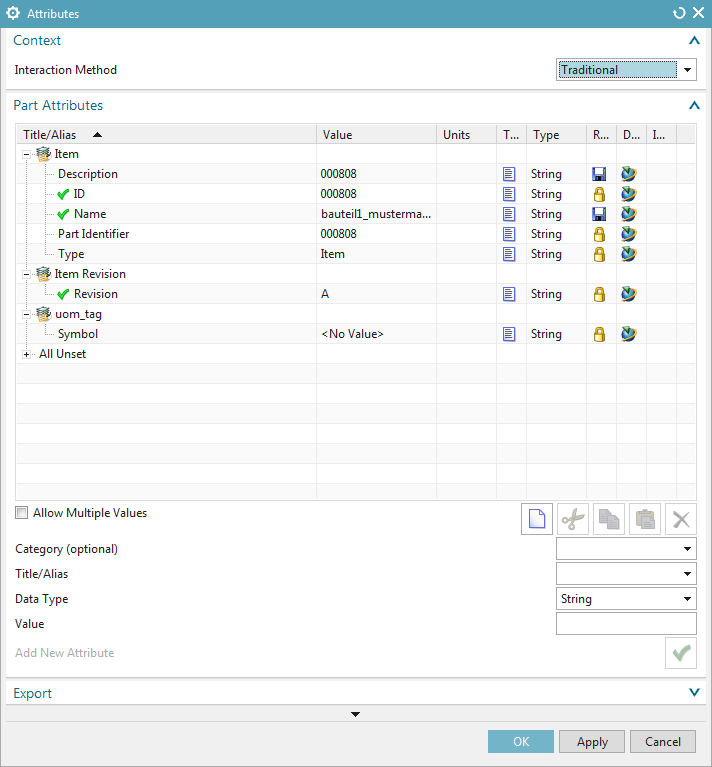
Alternatively, you can click Secondary Attributes ![]() after marking an entry in Value. The window Attributes (refer figure "Attributes Bulk") pops up. On the right you can choose the view Traditional (refer figure "Attributes Traditional"). The attributes of an item are now listed in a chart an can be edited.
after marking an entry in Value. The window Attributes (refer figure "Attributes Bulk") pops up. On the right you can choose the view Traditional (refer figure "Attributes Traditional"). The attributes of an item are now listed in a chart an can be edited.
Click Name and in Value type the Name. Then press the Return-key.
Here, in Item-Description, you can add descriptions of your item, like its containing assembly, etc.
Confirm with OK.
To create the Model, click OK.
| Hint: |
|
| Attention: |
Your new item is created when NX saves it. Simultaneously, a respective revision and part file is also created. The item is only visible in Teamcenter after refreshing. To do so, click View -> Refresh or press the key F5. |
Creating a copy of an existing item in NX
During this tutorial and during exam phases you may need to edit given items. To get editing privileges you need to create a copy of given item. To do so follow these instructions:
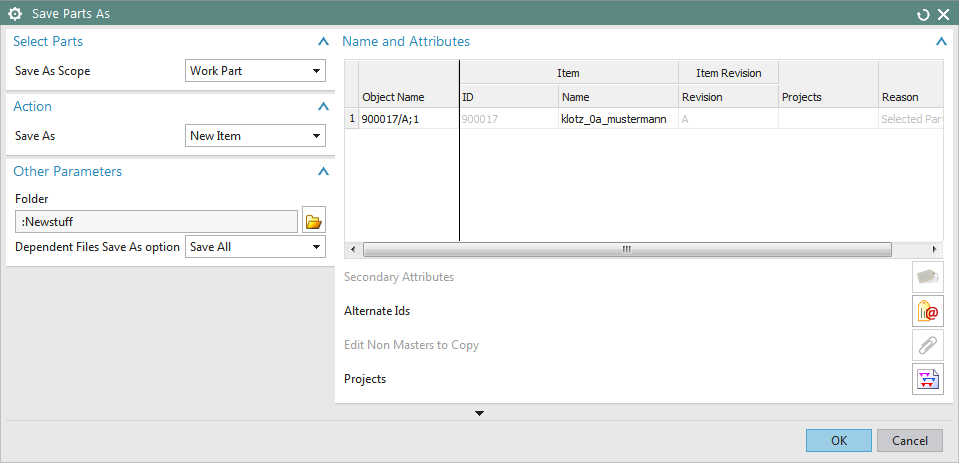
Open the item you are told to edit in NX. For demonstrational purposes search for the item klotz_0a of the Owning Users uebung_et. Please leave Owning Group empty. (Refer to Chapter 2.8 "searching the database"). In NX click File -> Save -> Save As. The window Save Parts As pops up. In this click the dropdown menu and chooseAction -> Save As "New Item" (refer figure "Save Parts As"). Then enter a new name by double clicking Name. A new ID is generated automatically. In Other Parameters, you can choose the directory you want to save in. Confirm by clicking OK.
Now you created a copy of the given item, which you can edit and save.
| Attention: |
|