In this chapter you'll learn how to create and edit custom roles in NX. This allows you to customize NXs GUI individually and use your custom roles on any computer at any time.
| Attention: |
|
You can select the default role by clicking the tab Roles ![]() in the vertical menu on the left of your screen. Subsequently, select "Role CAD 2018".
in the vertical menu on the left of your screen. Subsequently, select "Role CAD 2018".
Customize window & creating tool bars:
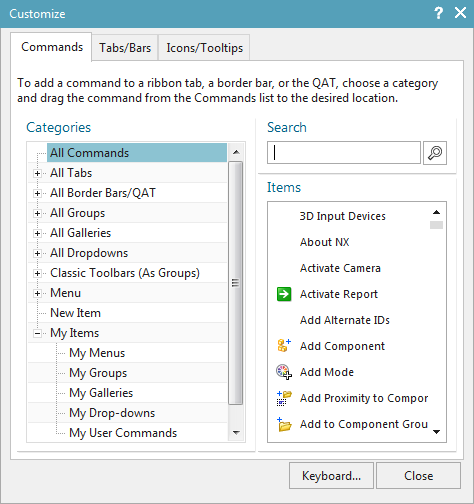
To edit roles, you have to open Customize (Strg +1) via Tools -> Customize (refer figure "Customize"). Here you can find every button in NX and add it to your custom role. Additionally, you can edit preferences for your individual layout.
Open the window Customize. The tab Tabs/Bars contains every default toolbar as well as the toolbars you created. To delete a toolbar, you have to un-check the respective box. To add a toolbar, you have to check its box.
To create a new toolbar, choose New within Tabs/Bars. In the dialog window you can now type a name and choose the mode (e.g. drafting or modeling) in which it should be displayed.
Adding buttons:
To add a button to a toolbar (or delete it), choose the tab Commands. Here you can choose your desired function and place it in your toolbar via drag&drop.
| Important: |
|
Add the buttons "Block", "Cylinder", "Cone" and "Sphere" to your toolbar via the Commands tab. To do so, choose Commands -> All Tabs -> Home -> Feature -> More -> Design Feature -> ....
Alternatively you can find these buttons by using the command finder. Adding a button using this method requires you to close the customize window beforehand and click the desired button in the command finder with the RMB to choose Add to Ribbon Tab ->....
Creating a drop-down menu:
In order to add a drop-down menu to a toolbar, choose Commands within the window Customize and in the sub menu New Item, choose New Drop-Down and drag it to the toolbar.
Create a new drop-down menu in your toolbar and add the functions "Extrude" and "Revolve" to it. Make sure the box Show as Menu is checked for your new drop-down menu.
You can check if Show as Menu is active by RMB-clicking the drop-down Menu -> Content and Style.
Creating a group:
Groups enable you to organize buttons within your toolbar.
If you want to create a new group within your toolbar, go to the window Customize and choose Command --> New Item, then click the Button New Group and drag it to your toolbar.
Saving a Role:
If you want so save your personal preferences in a Role, click on an empty space within Roles with your RMB. Choose New User Role, enter a name and optionally assign a picture. (You'll be able to find your role within "User" and not within "System Defaults!)
You can now save any further changes to your role by right-clicking the role and choosing Save Role (Only User Roles can be saved!).
Ex- & Importing a Role:
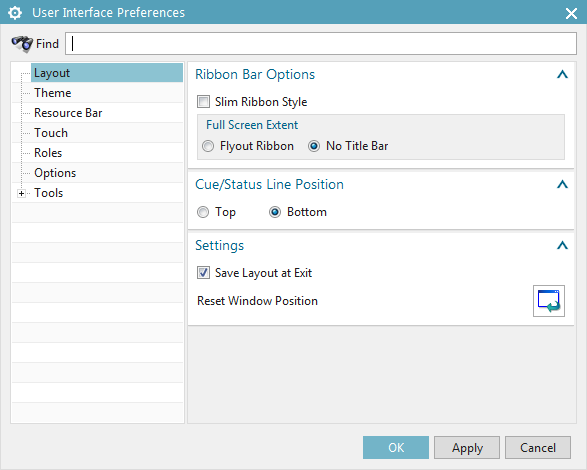
If you want to ex- or import a Role, complete the following steps: Choose File -> Preferences -> User Interface or press Strg+2. The window User Interface Preferences pops up.(refer figure "User Interface Preferences") Within this window you can choose New Role (export) and Load Role (import).
If you want to export a Role, you can choose a name and directory for your role in the window New Role File. Additionally, you can add a bitmap as an icon.
If you want to import a role, you have to select the desired role in the window Open Role File and confirm. The warning that pops up subsequently only tells you that all unsaved changes to the current role will be dismissed by loading anoter one.
The default Role can be opened again by choosing it in Roles ![]() (Double-click on "CAD 2018").
(Double-click on "CAD 2018").