To be able to check whether you have installed all the necessary parts, it can be helpful to call up or create a parts list of the assembly. For example, you can use this information to determine whether the correct number of screws has been installed by one type. To insert the parts list, go to Insert -> Table -> Parts List... and place the parts list next to its assembly by left-clicking on it. You may need to rotate the list a little bit to be able to see it better.
The existing columns stand for:
| PC NO | Number assigned by the program |
| Part Name | Teamcenter ID |
| QTY | Quantity |
Occasionally, it may be of interest to display additional information in the parts list. Proceed as follows:
- Select any column and click on it with the RMB. (see figure "column selected").
- In the context menu that appears, choose Insert -> Columns to the Right.
- In the next step, select the newly created column, call up the context menu with the RMT and choose Settings.
Under the menu item Columns (see figure "Menu Settings) you can select which information is to be displayed in the newly created column. In the example the part name is of interest:
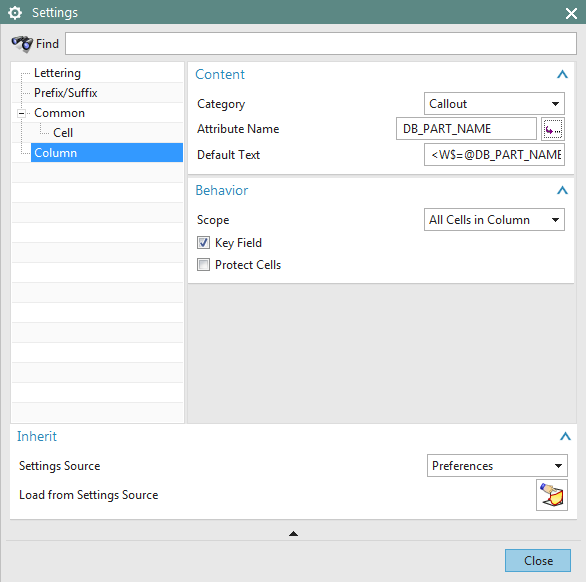
- In the Category dropdown box, choose CALLOUT
- In the Attribute Name dropdown box, choose DB_PART_NAME
- Close the menu with Close .
Now your parts list should look like in (see figure "parts list supplemented "). You may have to adjust the column width by dragging the columns.
The now placed list still has to be sorted. To do this, move the mouse to the upper left corner of your list until the complete table appears in red. Then click on the list with the RMB and select Sort... from the menu. In the window that then opens, a check mark must be placed in front of Part Name and confirmed with OK.