For this reason, it may make sense to reduce the size of the viewing frame.
Open the bg_scooter specification and switch to drawing mode.
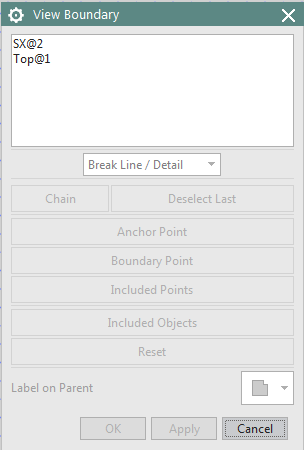
| Break Line / Detail | Defining a section using previously created curves | For this function, a curve must first be defined in "Work in Member View"mode. |
| Manual Rectangle | Draw a rectangle by hand |
You can use this function to adjust the boundary by dragging a rectangle. This method is inaccurate, but it makes sense if only a part of the drawing object is to be displayed. |
| Automatic Rectangle | Automatic cutting |
This function automatically creates a rectangular section, which is usually too large. |
| Bound by objects | Section defined by objects to be contained | This function allows you to define the section of objects or points to be included. However, an anchor point must first be defined. This feature provides a quick and accurate way to vary the boundary frame. |
In this exercise, you use the Break Line / Detail function. Therefore, you must first define a curve.
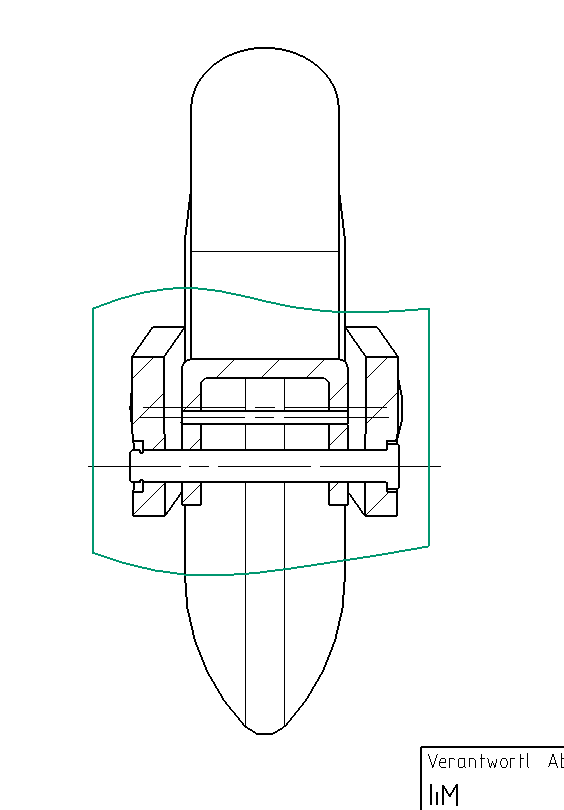
Quit the menu with Cancel and switch to Active Sketch View mode in the step section view (by right-clicking on the view frame). Now define a boundary frame (with the functions Spline, Line etc.) as shown in the figure "Limiting spline"(see figure "Limiting Spline").
This eliminates unimportant elements and greatly increases the clarity of the drawing.
Open View Boundary![]() again and select the view Stufenschnitt.
again and select the view Stufenschnitt.
Use the Break Line / Detail function to select your border and confirm with OK.
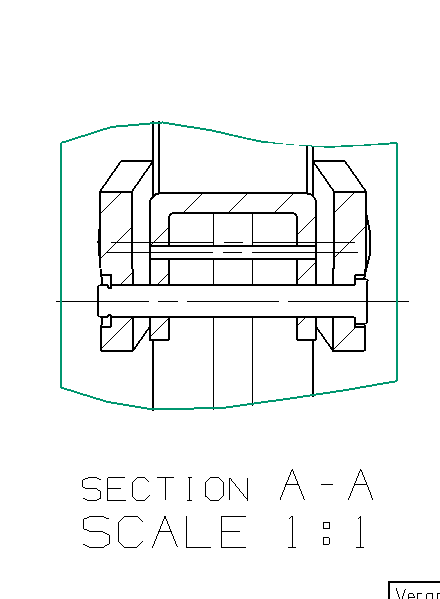
Your step section view should now correspond to the figure (see figure "Step section view").