Before you start processing the component, you should familiarize yourself with managing PMIs using the Part Navigator.
List of PMIs
You will find the PMI tab on the left in the Part Navigator. Expand to display a list of all PMIs that you have already created, which you can delete or edit using RMB. By clicking on a particular PMI, it will also light up in colour in your model.
Model View
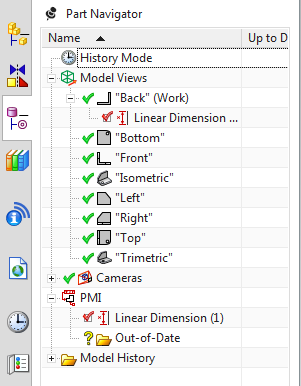
You can also find the section Model Views in the Part Navigator. A list of different views, which you already know from the chapter on technical drawings (Top, Bottom, Left, Right etc.) can be opened by expanding (see figure iehe Abbildung "Part Navigator"). By double-clicking on a desired view, your model rotates into the corresponding position. You can assign or move your PMIs to specific views. For example, if you insert a dimension in the "Front" view, it will only be displayed in the Front view, not in the others. By expanding a view, you can find all correspondingly assigned PMIs. With RMT->Display->in Views... you can now move them to another view or copy them into several views by checking the box in front of the desired model view.
The view you are currently in is labeled "(work)" in the Part Navigator.
| Note: |
|