In this exercise you'll learn about the feature Chamfer.
It's used for adding chamfers to edges.
Open the model pad, and save it as chamfer according to the naming convention.
Select the feature Chamfer ![]() .
.
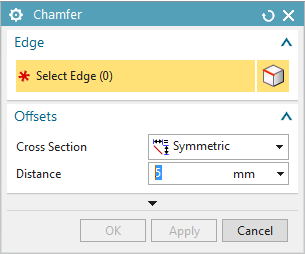
A menu as shown on the right pops up. (refer figure "Menu Chamfer")
Creating a simple chamfer
After opening this menu, choose  . Now you can create simple chamfers. Select the edges that you want to create chamfer on. Click all four sides of the pad that are parallel to the x-axis. A preview of the final chamfer will be rendered automatically.

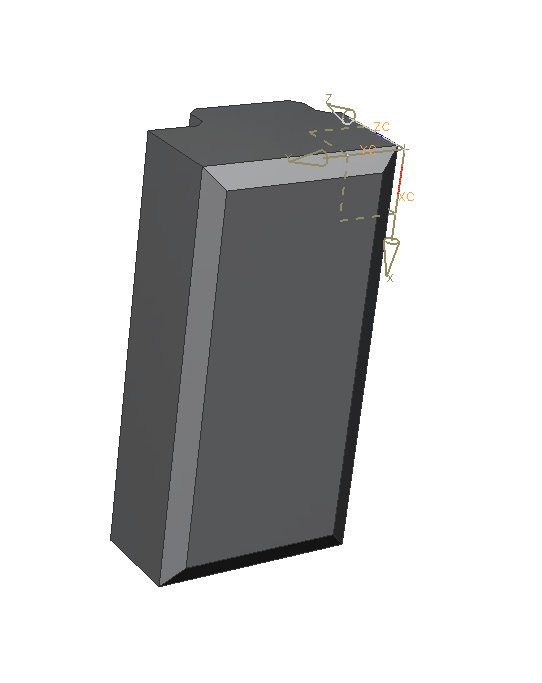
Enter 5mm as Distance and confirm by clicking OK. As you can see in figure "Pad with chamfer", the function chamfer can not only subtract material, but also add material when an inner edge is selected.
| Attention: |
|
| Hint: |
|
Creating a chamfer by specifying two distances
To create a chamfer defined by two distances, choose  . Click the four edges of the block where the pad is not located . In what order you click them is not relevant. Enter the following values as distances:
| Distance | Value [mm] |
|---|---|
| First Distance | 5 |
| Second Distance | 10 |
The chamfer will be created by clicking OK. (refer figure "asymmetric chamfer")
| Hint: |
|
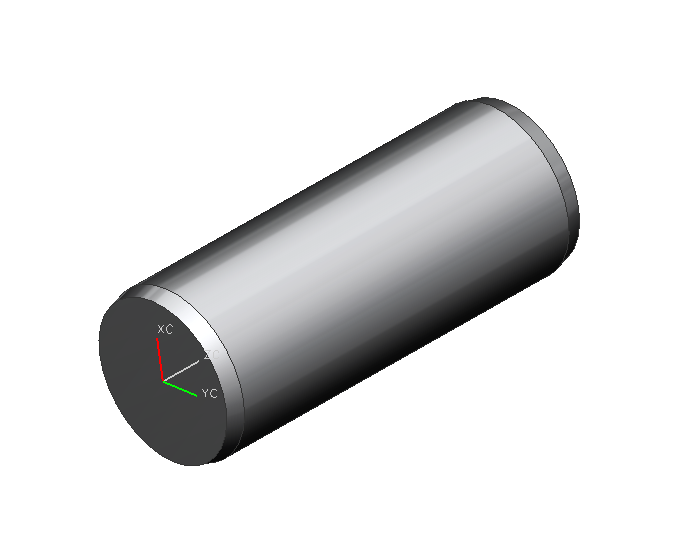
Creating a chamfer by distance and angle
Open the model cylinder, if you created it previously. Otherwise create a model cylinder and add a cylinder with the following dimensions to it:
| Dimension | Value [mm] |
|---|---|
| Diameter | 20 |
| Height | 50 |
Select the feature Chamfer ![]() .
.
Choose  . Click both outer edges.
Assign the following values:
| Dimension | Value [mm] |
|---|---|
| Distance | 2 |
| Angle | 15 |
Clicking OK creates the chamfer. (refer figure "chamfer on cylinder")
| Hint: |
|