The axis contains a groove that is not clearly visible in the side view. Therefore, it should be displayed as a detail view.
Select Detail View ![]() .
.

The Detail View menu bar opens. Here you have various options for setting up the detail view (see figure "Detail View"). These refer to the form of the detail frame and the selection of reference points:
- Rectangle by Center and Corner
- Rectangle by Corners
- Circular
For the current example, proceed as follows:
- Select Circular.
- Select the center point of the detail view, in this case position it near the groove.
- Now select Ratio in the Scale menu and enter 20:1.
- Use the cursor to draw a circle around the detail.
- Place the detail view in a free space. It can be postponed later.
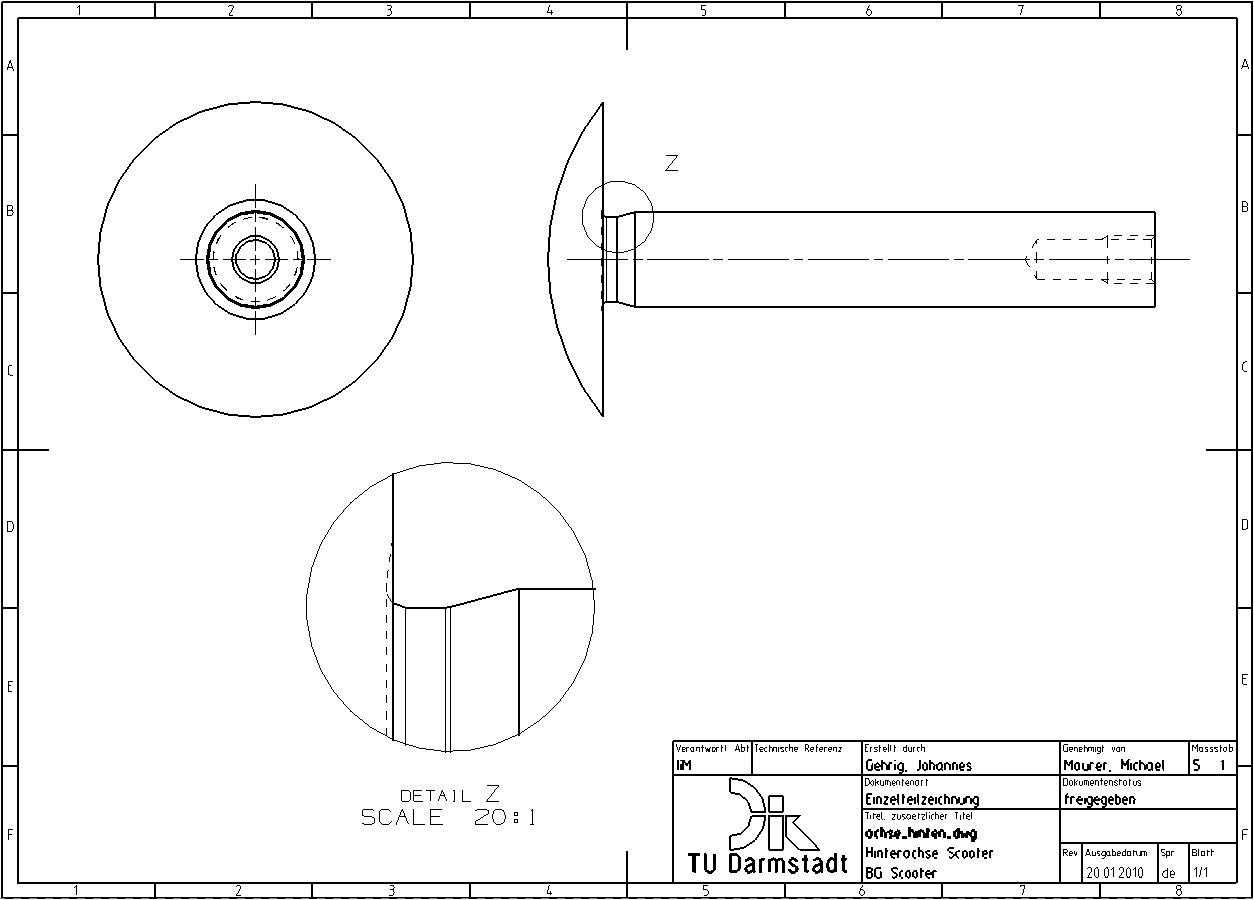
An enlarged view of the groove is now generated, which can be dimensioned. (see figure "Achse with Detail view).
To avoid confusion with the letters of a section (marked with the first letters of the alphabet), the last letters of the alphabet are used for the detailed views of details. Use the RMB to click on the text that indicates the detail and choose Settings -> Common -> View Label.
- Enter Z under Letter and confirm with OK.
Now the detail view is marked with the letter Z.