2.3.2.1 Check In/Check Out
If Tecnomatix is installed in the three-tier configuration, Process Designer allows multiple users to work simultaneously on the same project. The Check In & Check Out mechanisms decide which object can be edited or only viewed by a user. These are useful if you are working in a team as they ensure that only one person can edit a specific project scope at one time, thus preventing data inconsistency.
Check In
By checking in an object, the edited object is updated in the database and returned to the public eMServer. Another user is now able to check out this object and change or edit this object. To check in an object:
- Select the object(s) to be checked in from the Navigation Tree.
- Open the Check In dialog box using one of the following steps:
- Select Edit > Check In from the menu bar,
- Right-click the object and select Check In from the context menu,
- Click the Check In button
 on the toolbar.
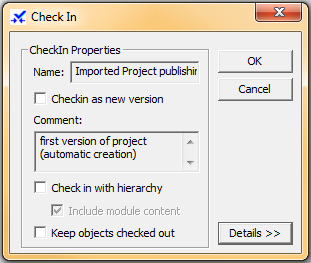
- Select the required options and click OK.
- The option Check In with hierarchy enables you to also check in all the children objects of the selected object node.
- The option Check In as new version enables you to check in a new version of the object node.
- The option Keep objects checked out enables you to update the database, but keep the object node checked out for further changes. Other users can view the updated object but have no access to edit the object.
Check Out
By checking out an object, the object is locked for editing by a specific user who checked out the object. Another team member can only view the object and is not able to make any changes on the object. To check out an object:
- Select the object(s) to be checked out from the Navigation Tree
- Open the Check Out dialog box using one of the following steps:
- Select Edit > Check Out from the menu bar,
- Right click the object and select Check Out from the context menu,
- Click the Check Out button
 on the toolbar.
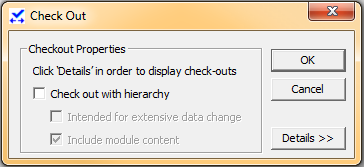
- Select the required options and click OK.
Another option is the Cancel Check Out ![]() command. This unlocks the selected nodes and all nodes related to them, and also cancels all changes that were made while the object nodes were checked out. The objects are returned to the public workplace as they were, before being checked out.
command. This unlocks the selected nodes and all nodes related to them, and also cancels all changes that were made while the object nodes were checked out. The objects are returned to the public workplace as they were, before being checked out.