3.2.2.2 Operation Location Points
As you might have noticed, the pick and place operation did not run successfully. This was resulted because until now, we have only defined the pick location and the place location. In order for the operation to run smoothly, you need to define more intermediate locations (via locations) to create a path for the robot's movement.
Before you define or manipulate any locations, you should reset the simulation in the Sequence Editor by clicking the Jump Simulation to Start button ![]() so that the robot returns to its original position and all simulated operations are reset. Alternatively, select the activate the snapshot Original Design in the Snapshot Editor with the options Object Visibility, Object Location, and Device Poses selected, to return all objects to their original position.
so that the robot returns to its original position and all simulated operations are reset. Alternatively, select the activate the snapshot Original Design in the Snapshot Editor with the options Object Visibility, Object Location, and Device Poses selected, to return all objects to their original position.
Add Current Location
After you reset the operation and the robot returned to its original position, you should add the Home pose of the robot as the Start location.
- Navigate to Path Editor and add either the Robot1_PNP_Op1 or its parent operation Robot Operation to the Path Editor using one of the following steps:
- Drag and drop the operation from the Operation Tree to the Path Editor,
- Select the operation in the Operation Tree and click the Add Operation to Editor button
 in the Path Editor.
- In the Path Editor, you will see the pick and place operation with the Pick location and Place location as its children.
- Add the current location to the Path Editor using one of the following steps:
- Right-click one of the locations and select Add Current Location from the context menu,
- Select one of the locations and click the Add Current Location button
 on the toolbar.
- A new location appears. By default, all new locations are named Via#. Rename this location to Start.
- Drag the start location or click the Move Up button
 , until it resides above the pick location.
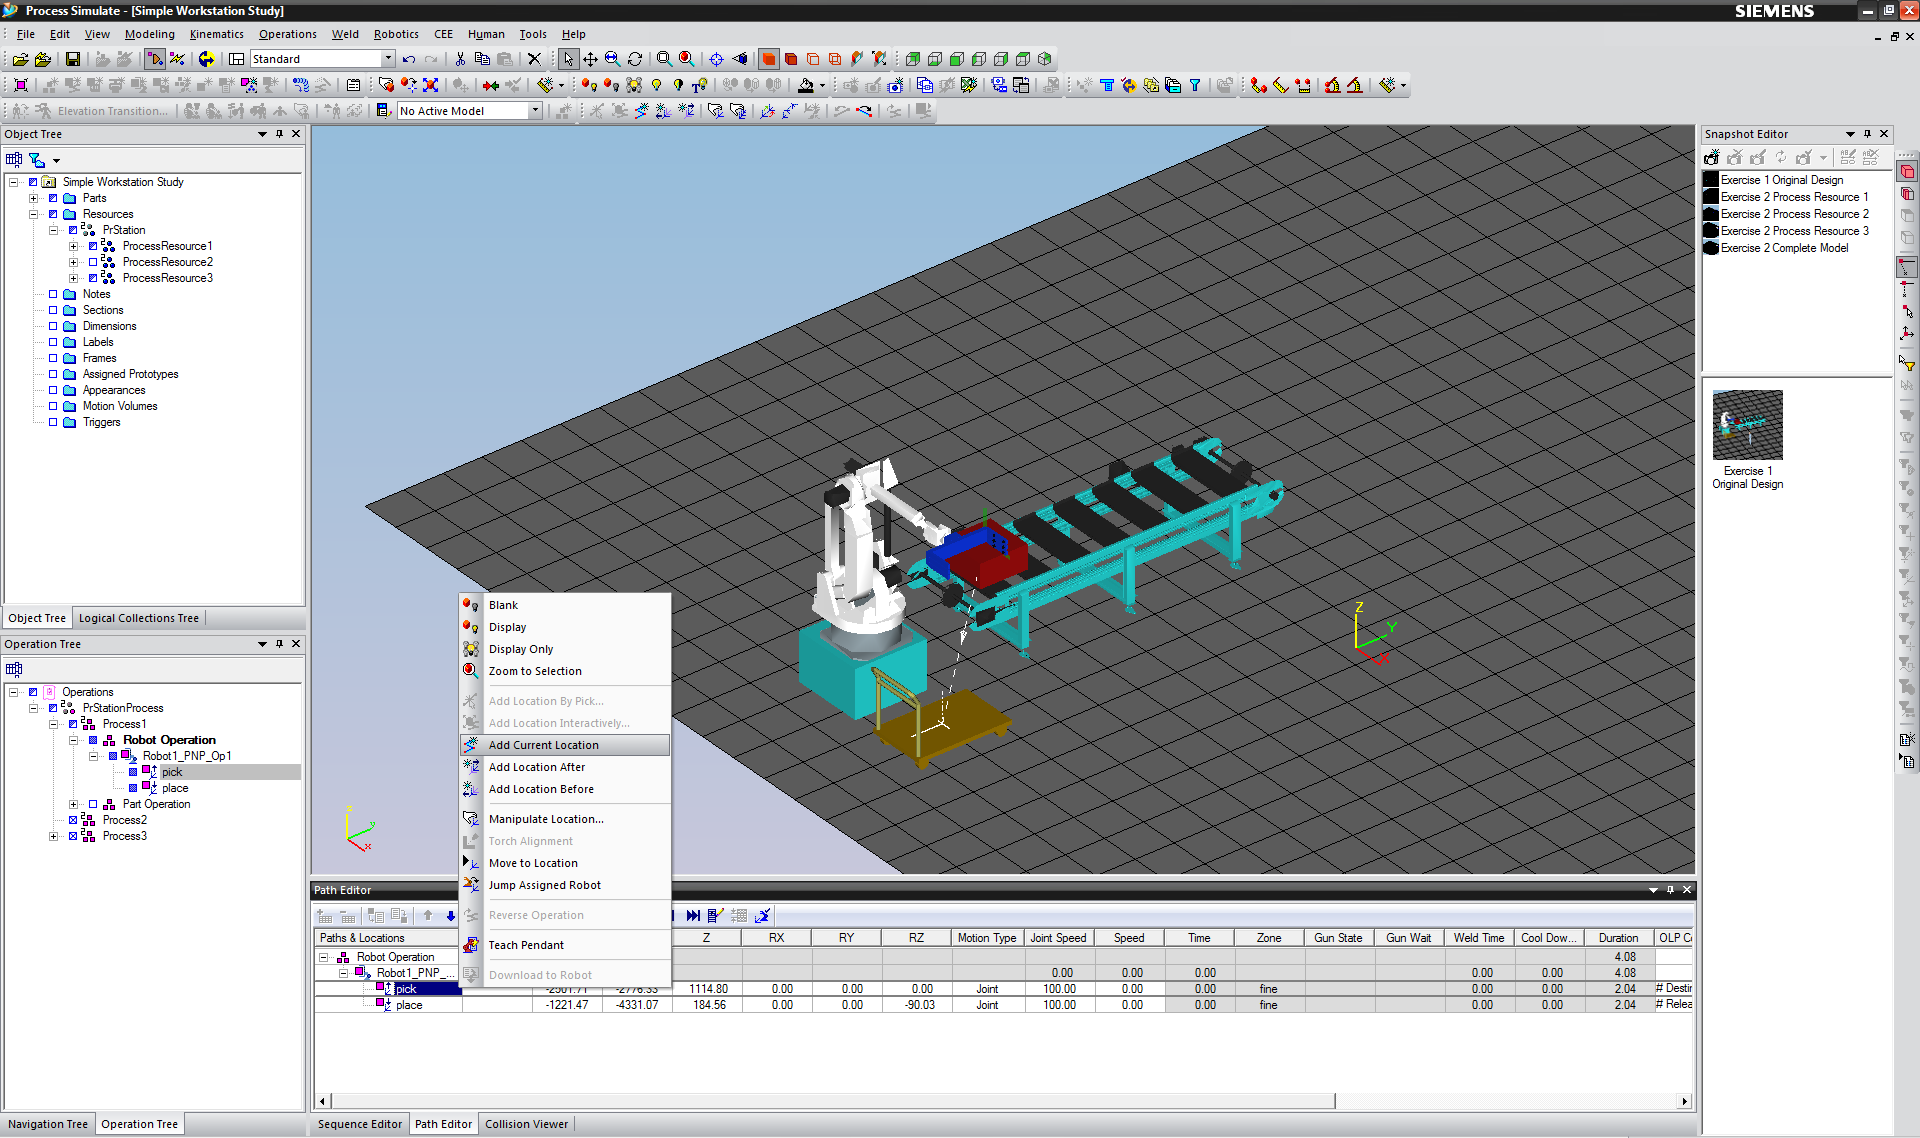
Figure: Add Current Location to the Pick and Place Operation in the Path Editor
Manipulate Location
In case the robot does not pick up the Box 1, this is caused by the wrong position of the Pick location. The Pick location is displayed as a white coordinate system frame that is connected with the Place location. The connection between these two locations is displayed as dashes. For example, if the Pick location is located above the Box 1, you can move it by following these steps:
- Select the Pick location, either in the Graphic Viewer or in the Path Editor, and do one of the following steps:
- Right-click and select Manipulate Location from the context menu,
- Click the Manipulate Location button on the toolbar.
- A Robot Jog [pick]: Robot window opens, similar to Placement Manipulator window, and a Manipulator Frame with its arcs also appears in the Graphic Viewer.
- Move or rotate the Pick location along the axes either by selecting the axis and clicking the Move One Step button (left and right) or by dragging the Manipulator Frame in the Graphic Viewer. Alternatively, you can enter the exact value of the axis in the Path Editor. You can also change the size of a step by clicking on the Step Size.
- Click Reset to return the robot to its original position or Close to accept the current position and close the window.
You can see that the arm of the robot only moves in its defined degrees of freedom. Move the Pick location to a right position, so that the robot can pick up the Box 1.
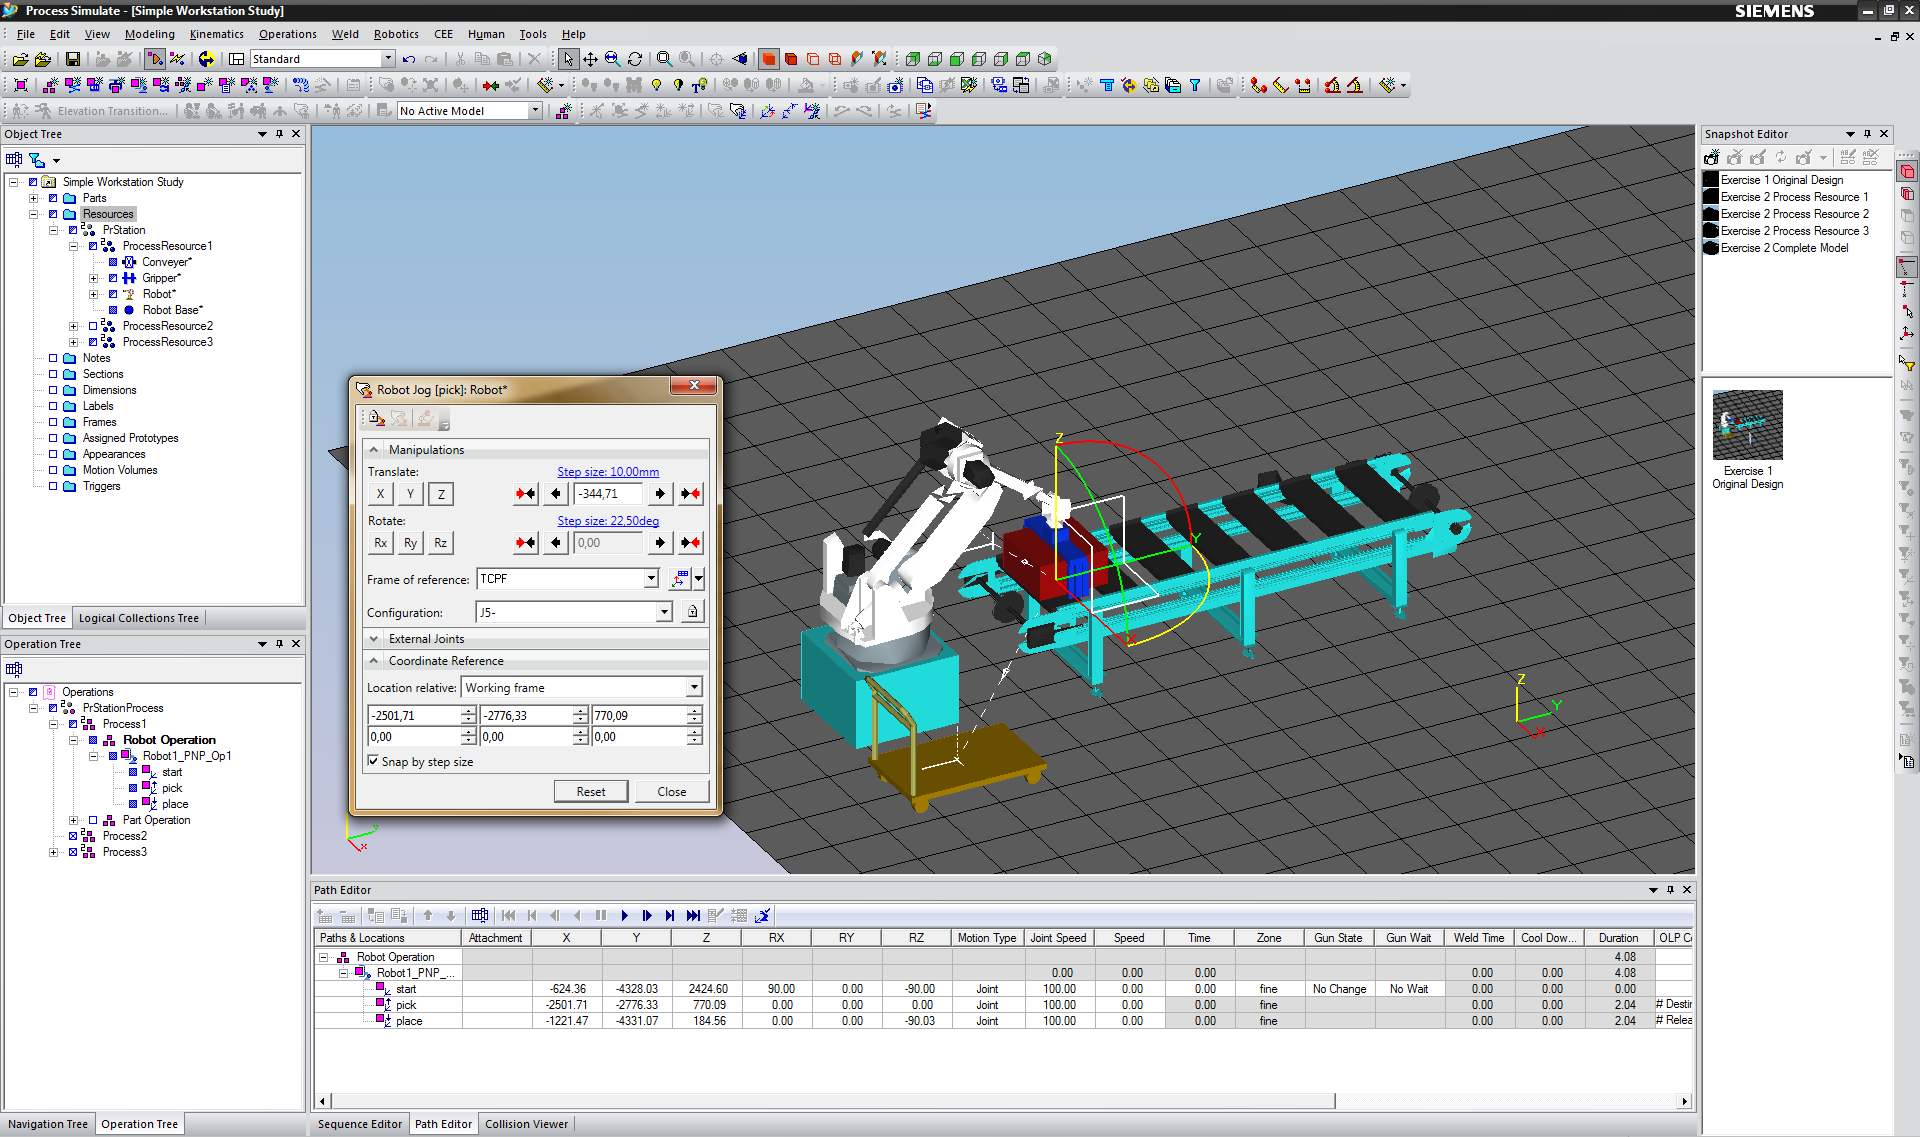
Figure: Manipulate Location of a Pick and Place Operation
Add Location Before/After
To prevent the collision between the robot and another objects and to make the operation runs more smoothly, you can add more locations to define the movement paths of the robot. This can be created by inserting via locations between the start and end location. There are different options on how you can add location:
- The option Add Location Before
 creates a new location before the selected location. The new location resides above the selected location in the Path Editor. A Manipulator Frame will also appear in the Graphic Viewer and you can manipulate the location created in the Path Editor.
 - The option Add Location After
 is similar to the Add Location Before option, only the new location is created after the selected location.
 - The option Add Location by Pick
 creates a new location at the point where you clicked in the Graphic Viewer. This option is only available, if you selected the parent operation in the Path Editor first (here Robot1_PNP_Op1 for example).
Try to create a path for the robot to complete the pick and place operation. The robot should pick the Box 1 from the Conveyor and place it on the Cart. You can insert as many via locations as you need for the pick and place operation to run smoothly. Do not forget to create a snapshot after you finished.
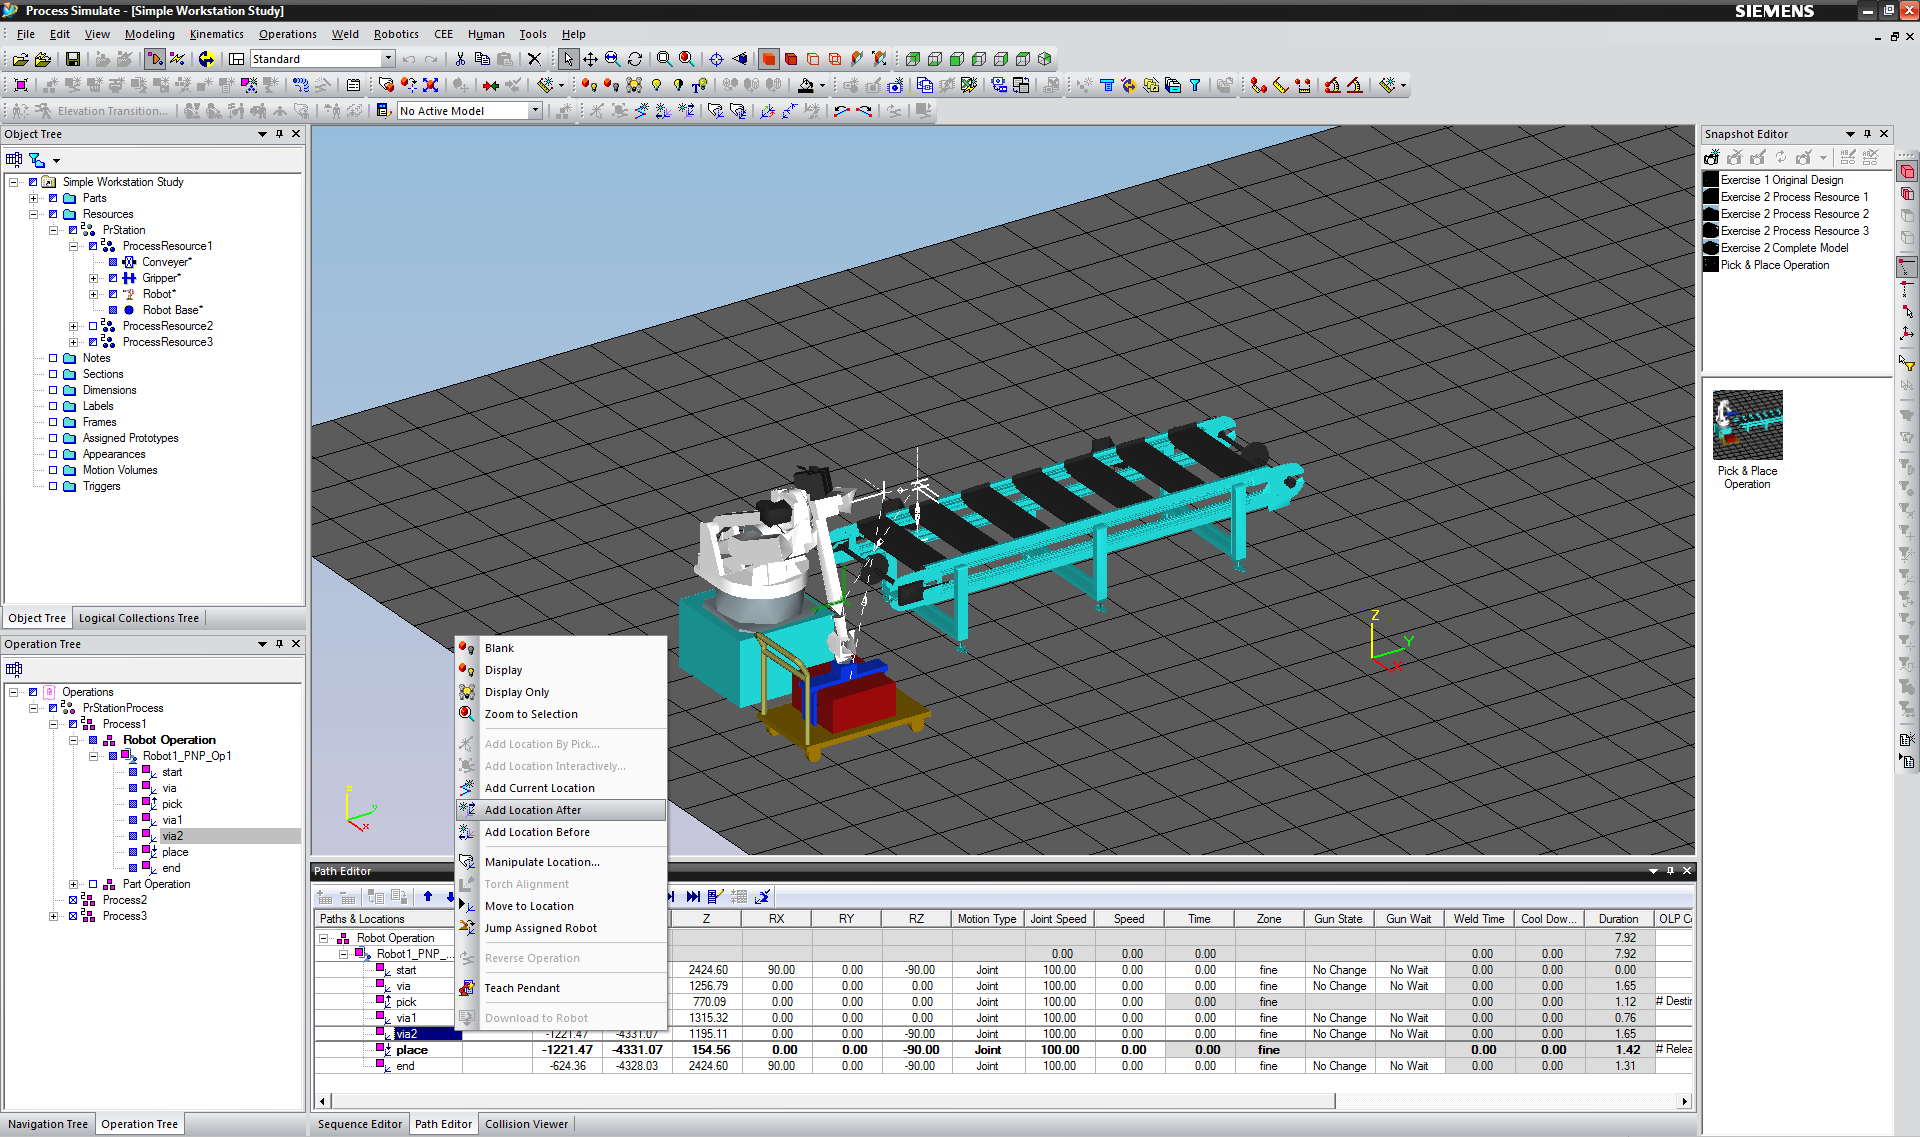
Figure: Add Location Before & Add Location After to Create a Complete Path